TL;DR:
- Regular roof inspections can detect damage early and prevent costly repairs in South Florida's harsh climate.
- Use ground-based tools like binoculars and photos for safety; avoid walking on steep or wet roofs.
- Prioritize checking flashing, shingles, and attic for signs of wear, leaks, or mold to extend roof lifespan.
A South Florida homeowner gets a repair estimate after a storm and nearly falls over at the number. Sound familiar? The hard truth is that most of that damage could have been caught months earlier with a simple, systematic roof check. Aging shingle roofs in Palm Beach and Broward counties face relentless heat, humidity, and hurricane-force winds. That combination accelerates wear faster than almost anywhere else in the country. The good news is that a structured inspection checklist puts you in control. You do not need to be a roofing expert to spot early warning signs, and catching problems early is the single most effective way to avoid a five-figure repair bill.
Table of Contents
- What you need before starting your inspection
- Exterior roof inspection: Step-by-step checklist
- Interior and attic inspection: Hidden trouble spots
- Cost-effective repairs and regular maintenance to extend shingle life
- Our take: What most checklists miss about Florida roofs
- How we can help protect your roof investment
- Frequently asked questions
Key Takeaways
| Point | Details |
|---|---|
| Check roofs twice yearly | Regular and post-storm inspections can help you spot early issues before they become major, saving you thousands. |
| Prioritize flashing and shingle edges | Most leaks and hurricane damage start at these vulnerable points, so examine them closely during every inspection. |
| Professional help is worth it | Pros can extend your roof’s life 5–10 years for a fraction of replacement cost, especially on older homes. |
| Every problem has a cost-effective fix | Securing loose shingles, cleaning gutters, and minor repairs done on time can delay roof replacement by years. |
What you need before starting your inspection
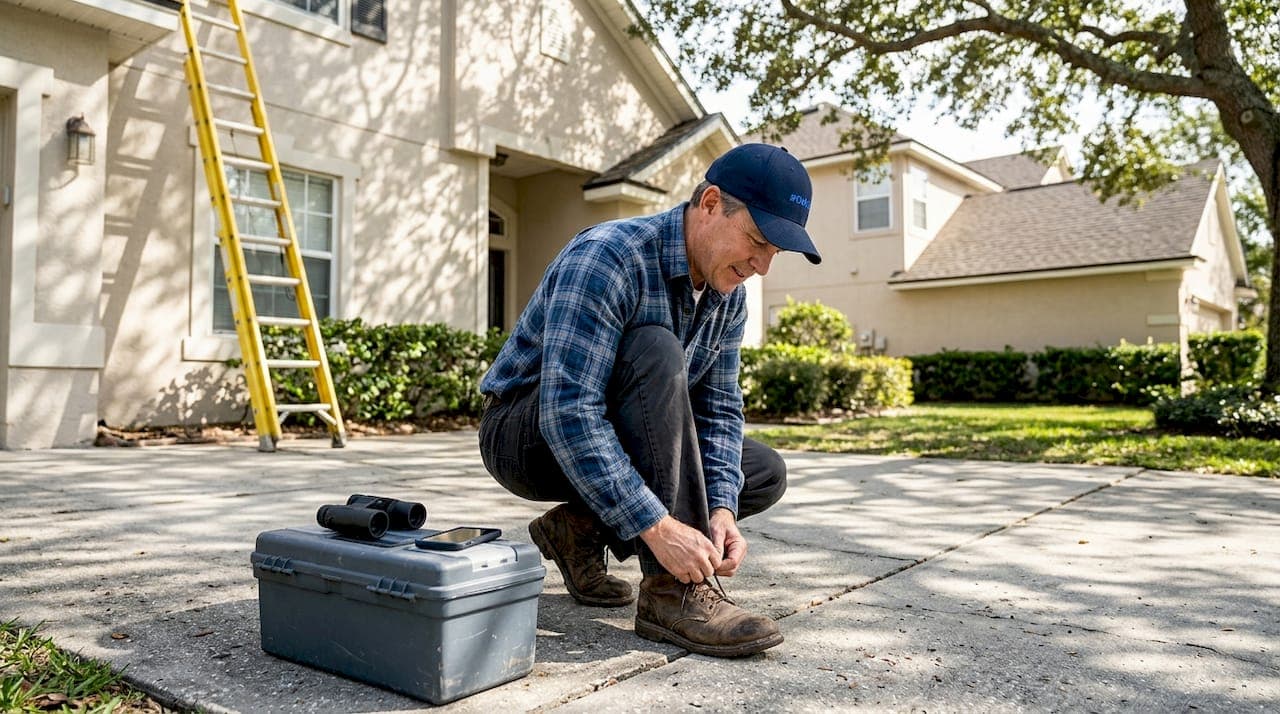
Now that you know why regular inspections matter, here is how to get started safely and prepared. Rushing onto a roof without the right tools or mindset is how minor checks turn into emergency room visits. Take five minutes to gather what you need before you step outside.
Essential inspection equipment
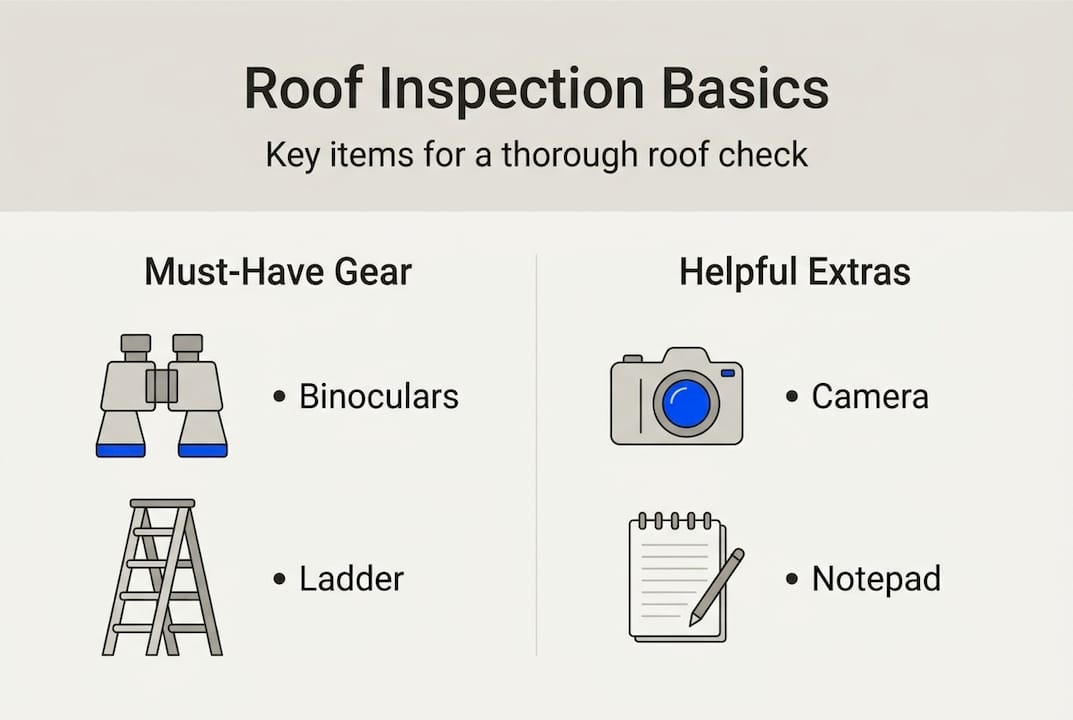
| Item | Purpose |
|---|---|
| Binoculars | Safely examine shingles from the ground |
| Smartphone or camera | Document findings with photos |
| Ladder (if experienced) | Access lower eaves and gutters |
| Work gloves | Protect hands during gutter checks |
| Safety harness | Required if you ever step onto the roof |
| Rubber-soled roof boots | Grip on sloped surfaces |
| Flashlight | Attic and low-light areas |
| Notepad or inspection app | Record observations and dates |
For most homeowners, binoculars and a smartphone are all you really need. DIY ground checks are safe, but attic access, steep pitches, and detailed flashing work should always be left to a licensed professional. Trying to do too much yourself is one of the most common mistakes we see.
Before you begin, follow these preparation steps:
- Clear the area around the home so you can walk the full perimeter
- Check the weather forecast and choose a dry, calm day
- Let someone in the house know you are doing an inspection
- Have your phone charged and ready to photograph anything unusual
- Review any roof inspection advice specific to your area before you start
Safety first: Never walk on a steep or wet shingle roof without professional training and proper fall protection. Most exterior problems can be identified safely from the ground with binoculars. When in doubt, call a professional.
Pro Tip: Do not wait for your scheduled inspection after a major storm. Step outside within 24 hours and do a quick ground-level scan. Wind-lifted shingles and displaced flashing are easiest to spot before debris is cleaned up. Document everything with photos and share them with your professional maintenance services provider.
Exterior roof inspection: Step-by-step checklist
With your inspection tools gathered, follow this checklist to cover every vulnerable spot outside your home. Work systematically from the ground up, moving around all four sides of the house before looking at any single area in detail.
Exterior inspection checklist:
- Clear visible debris from gutters, valleys, and flat sections using a visual scan from the ground.
- Inspect gutters and downspouts for granule buildup, sagging, or separation from the fascia.
- Look for cracked, curling, or missing shingles along every roof plane, paying close attention to edges.
- Check for granule loss. Bare patches or heavy granule accumulation in gutters signal advanced wear.
- Scan for moss, algae, or dark streaking, which trap moisture and accelerate shingle breakdown.
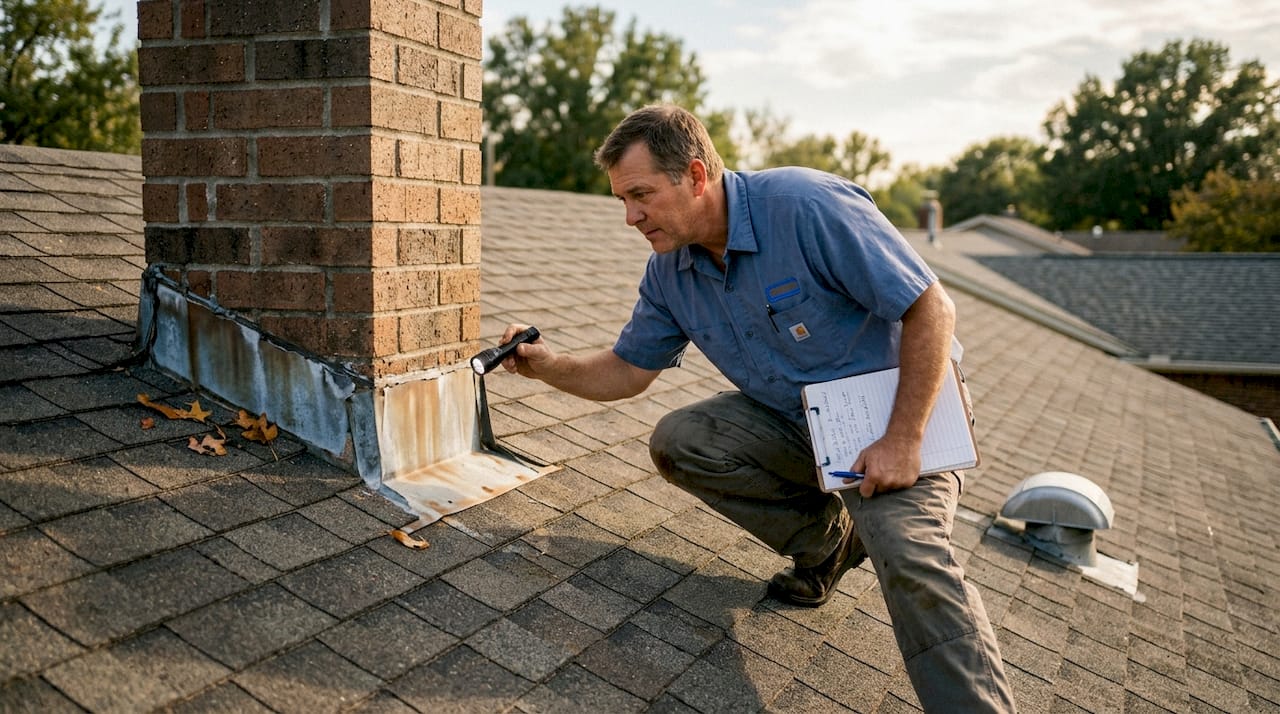
- Examine flashing at chimneys, vents, skylights, and all roof penetrations for gaps or rust.
- Inspect the ridge line and eaves for lifted shingles, separated seams, or damaged drip edge.
- Look at caulking around all penetrations and verify it has not cracked or pulled away.
Flashing issues cause up to 90% of leaks, and missing, cracked, or curling shingles combined with granule loss are the most reliable early warning signs you will find. Do not skip the flashing check just because it looks intact from a distance.
Common vs. severe problems: Repair priority guide
| Problem | Severity | Urgency |
|---|---|---|
| Minor granule loss in gutters | Moderate | Monitor, schedule maintenance |
| Granule loss over 25% of surface | Severe | Call a pro immediately |
| One or two missing shingles | Moderate | Repair within 30 days |
| Widespread curling or cracking | Severe | Urgent professional assessment |
| Small flashing gap at chimney | Moderate | Seal within 2 weeks |
| Open flashing or separated seam | Severe | Emergency repair needed |
| Light moss or algae streaking | Low | Treat and monitor |
| Active moss growth with lifting | Moderate | Professional cleaning needed |
Granule loss exceeding 25% of your roof surface is a clear sign that shingles have reached advanced wear. At that point, you need a professional assessment, not a patch job. Also, 80% of hurricane damage occurs at eaves and ridges due to unsecured shingles or poor flashing, which makes those spots your highest-priority areas in South Florida.
Pro Tip: If you cannot safely see the upper sections of your roof, hire a drone operator or ask your roofing contractor to use one during their next visit. A few aerial photos can reveal problems that are invisible from the ground and save you thousands. Check shingle damage signs in your area to understand what is common locally.
Interior and attic inspection: Hidden trouble spots
Exterior problems often lead to hidden interior issues. Use this guide to uncover trouble before it gets serious. Water that enters through a compromised shingle or failed flashing does not always drip straight down. It travels along rafters and sheathing, sometimes appearing far from the actual entry point.
Attic inspection steps:
- Enter the attic carefully during daylight hours. Bring a flashlight even if there is a light fixture.
- Look for water stains on the underside of the roof deck. Dark rings or streaks indicate past or active leaks.
- Check for rot or soft spots in the wood sheathing by pressing gently with your hand.
- Smell for musty odors, which indicate mold growth even when you cannot see it yet.
- Assess ventilation. Blocked soffit vents or a hot, stuffy attic point to airflow problems that shorten shingle life.
- Look for daylight coming through the roof deck. Any visible light means there is a gap that needs immediate attention.
Attic inspection is crucial. Stains, rot, and poor ventilation found inside often confirm roof leaks or structural risks that are not yet visible from the exterior.
Warning signs that demand immediate action:
- Active dripping or pooled water anywhere in the attic
- Black or green mold on wood surfaces or insulation
- Sagging or buckled roof deck boards
- Daylight visible through the sheathing
- Evidence of pest entry such as droppings, nesting, or chewed insulation
Important: Mold and pest entry are not cosmetic problems. Both spread quickly in South Florida's humidity and can compromise your home's air quality and structural integrity within weeks. If you find either, stop and call a professional the same day.
Photograph every finding before you leave the attic. Clear images of stains, rot, or mold give your contractor an accurate picture of the situation and speed up the repair process considerably. For guidance on spotting attic leaks before they become structural problems, local resources can help you understand what is typical for South Florida homes.
Cost-effective repairs and regular maintenance to extend shingle life
Once you have completed your checks, use these proven strategies to fix issues and keep your roof in peak condition. The goal is not perfection on day one. It is consistent, documented care that adds years to your roof's life.
Routine maintenance tasks that make a real difference:
- Secure any loose or lifted shingles with roofing cement or nails before the next storm
- Seal minor gaps around flashing and penetrations with approved roofing caulk
- Clean gutters and downspouts at least twice a year to prevent water backup
- Trim overhanging branches to reduce debris accumulation and impact risk
- Remove moss or algae with a low-pressure rinse and an approved treatment solution
- Schedule a professional inspection for anything beyond surface-level maintenance
Twice-yearly professional inspections cost $250 to $750 and can extend your roof's life by 5 to 10 years, saving you more than $20,000 compared to a full replacement. That math is hard to argue with.
When deciding whether to repair or replace, focus on the roof deck. If the underlying structure is solid and shingles cover less than 30 percent of the surface with severe damage, repair is almost always the smarter financial choice. Full replacement becomes necessary when the deck itself is compromised or when damage is widespread.
Annual maintenance should run 1 to 3 percent of your roof's value per year, which is a fraction of the $20,000 to $40,000 cost of a full replacement. Consistent small investments beat one massive unavoidable expense every time.
Pro Tip: Keep a simple inspection log with the date, photos, and any work completed. A written record protects you during insurance claims and gives contractors a clear history when they assess your roof. Explore minor repairs and maintenance options to understand what a professional can handle affordably.
In South Florida, your most important maintenance window is the month before hurricane season begins in June. Address any loose shingles, open flashing, or gutter issues before the first named storm of the year.
Our take: What most checklists miss about Florida roofs
Most national roof inspection checklists are written for a broad audience, and that is exactly the problem. They cover the basics well, but they were not written with South Florida's specific conditions in mind.
Here is what we have learned working with homeowners across Palm Beach and Broward counties: flashing is almost always the first thing to fail, and it is almost always the last thing homeowners check. Every penetration, every edge, every valley deserves a close look every single time. Not just a glance.
We also see homeowners skip post-storm documentation because the damage looks minor. That is a costly mistake. Insurance adjusters and contractors both work faster and more accurately when you hand them timestamped photos taken within hours of a storm. It is not optional here.
One more thing: avoid applying generic roof coatings unless they are specifically approved for your shingle type and South Florida's climate. The wrong product can void your warranty and trap moisture. For Florida-specific solutions that are tested for local conditions, always verify compatibility before applying anything to your roof.
How we can help protect your roof investment
If your inspection checklist turned up warning signs, or if your shingles are simply aging and losing flexibility, you do not have to face a $20,000 to $40,000 replacement bill. There is a smarter path forward.
At Shingle Roof Renewal, we specialize in restoring aging shingle roofs across South Florida using Fresh Roof's GreenSoy Technology. Our process works at the molecular level to restore shingle flexibility and extend roof life by 10 to 15 years, backed by a 6-year transferable warranty. Whether you need a full renewal, storm-damage assessment, or ongoing maintenance, our specialty services are designed to protect your home without the cost of a full tear-off. Homeowners in Fort Lauderdale and across the region trust us to give them an honest assessment and a cost-effective plan. Reach out today and let us help you protect what matters most.
Frequently asked questions
How often should I inspect my shingle roof in South Florida?
Inspect your roof at least twice a year and after every major storm. Semi-annual and post-storm inspections are specifically recommended for storm-prone regions like South Florida.
What is the most common cause of roof leaks?
Flashing failures around penetrations and roof edges are responsible for about 90% of all leaks, making flashing the single most important area to check during any inspection.
How much does a professional roof inspection cost in South Florida?
Professional inspections typically cost $250 to $750, depending on roof size and complexity. That cost is minimal compared to the thousands you can save by catching problems early.
Can I perform a roof inspection myself?
You can safely conduct a ground-level DIY inspection using binoculars and a camera, but anything involving heights, the attic, or detailed flashing work should be handled by a licensed professional.