TL;DR:
- Florida's harsh climate accelerates shingle deterioration, requiring regular proactive assessments.
- Use ground-level inspections, tools, and safety precautions to identify early roof damage signs.
- Thorough documentation and early restoration help homeowners save money and strengthen insurance claims.
If you own a home in Palm Beach or Broward County, your shingle roof faces conditions that most of the country never deals with. Intense UV exposure, hurricane-force winds, and year-round humidity work together to wear down shingles faster than you might expect. Ignoring early warning signs can turn a manageable repair into a full replacement costing $15,000 or more. The good news is that a structured damage assessment workflow, done before storm season, can help you catch problems early, protect your home, and save thousands. This guide walks you through exactly how to do it.
Table of Contents
- Understanding common roof damage in South Florida
- Preparation: Tools, materials, and safety requirements
- Step-by-step roof damage assessment workflow
- Documenting and reporting roof damage
- Expert perspective: Why proactive roof assessment pays off in Florida
- Get professional roof restoration before storm season
- Frequently asked questions
Key Takeaways
| Point | Details |
|---|---|
| Proactive assessment saves money | Early detection of roof damage allows for restoration before costly repairs become necessary. |
| Proper documentation is essential | Clear notes and photos maximize your insurance claim success and help restoration providers act fast. |
| Local climate accelerates roof wear | Palm Beach and Broward’s weather means shingle roofs need more frequent checks and maintenance. |
| Safety first during inspections | Using the correct tools and following safety precautions prevents injuries and ensures accurate assessments. |
Understanding common roof damage in South Florida
South Florida's weather is relentless. Your roof absorbs more punishment per year than roofs in most other states, and that adds up fast. Florida's climate accelerates shingle degradation, making regular assessment not just smart but necessary for homeowners here.
The most common causes of shingle roof damage in Palm Beach and Broward counties include:
- Wind damage: Even tropical storms well below hurricane strength can lift shingle edges, break seals, and create entry points for water.
- UV exposure: Florida's sun is intense. Constant UV radiation dries out shingles, causing them to become brittle and crack over time.
- Water intrusion: Heavy rain combined with poor drainage leads to leaks, rot, and mold growth inside your roof structure.
- Algae and mold: Humidity creates the perfect environment for algae streaks and mold, which eat away at shingle granules.
- Debris impact: Palm fronds, branches, and storm debris cause physical damage that weakens shingles and flashing.
Knowing what to look for is just as important as knowing the causes. Common visible signs of damage include granule loss in gutters, curling or buckling shingles, dark staining, missing shingles, and water spots on interior ceilings. These signs rarely appear all at once. Usually, one or two show up first, which is exactly why early detection matters so much.
The longer damage goes unaddressed, the more your roof structure is exposed to moisture. What starts as a few missing granules can escalate into wood rot and interior water damage within a single storm season. Pairing your roof care with proper roof and gutter protection is one of the most effective ways to slow this progression.
If you are weighing whether to repair or restore, understanding the full picture of restoring your roof versus replacing it can help you make a smarter financial decision.
"The roof that looks fine from the street may already be failing at the granule level. By the time damage is obvious, it has often been building for months."
Pro Tip: Schedule a roof assessment within 48 hours after any named storm or major wind event. Waiting even a few weeks can allow small entry points to become serious leaks.
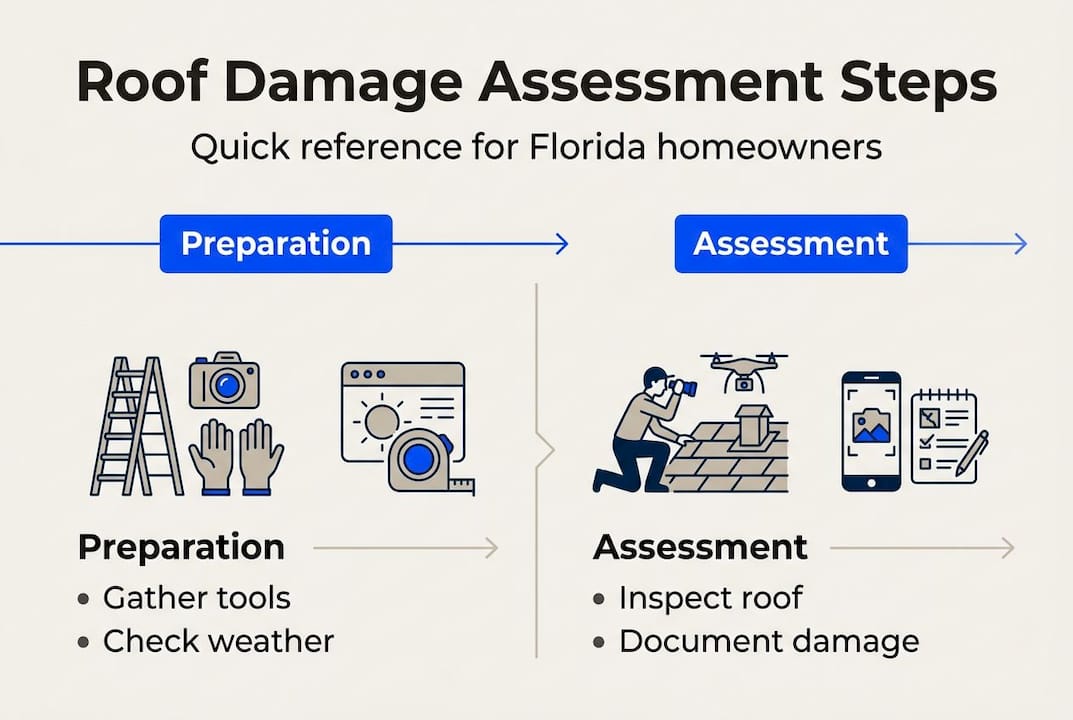
Preparation: Tools, materials, and safety requirements
Recognizing the signs of damage is just the first step. Here's what you'll need before starting your assessment.
A safe and thorough roof inspection starts on the ground, not on the roof. Rushing up a ladder without the right tools or safety measures is how minor inspections turn into emergency room visits. Proper preparation is key to safe and thorough roof inspection, and it takes only a few minutes to get it right.
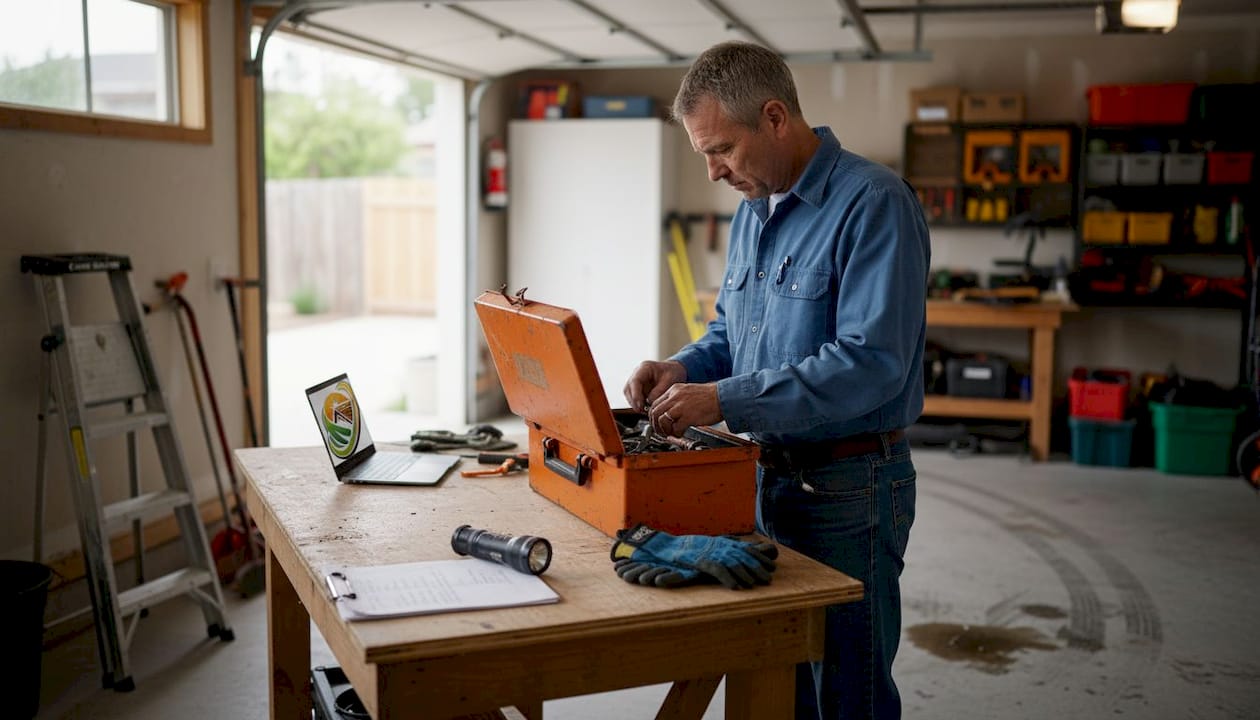
Essential tools and materials:
| Item | Purpose |
|---|---|
| Extension ladder | Safe roof access |
| Non-slip shoes | Prevent falls on sloped surfaces |
| Safety harness | Fall protection on steeper pitches |
| Flashlight | Inspect attic and dark areas |
| Camera or smartphone | Document all findings visually |
| Notepad or digital form | Record damage details and locations |
| Gloves | Protect hands from sharp debris |
| Binoculars | Ground-level visual scan before climbing |
Safety rules you should never skip:
- Never access your roof when it is wet or damp. Wet shingles are extremely slippery.
- Always have a second person present to stabilize the ladder and call for help if needed.
- Avoid inspecting during high winds or immediately after a storm when conditions are still unstable.
- If your roof pitch is steep (above 6:12 slope), use a harness or call a professional.
For homes in Palm Beach and Broward counties, there are a few local factors worth noting. Many homes in this region have tile or flat roof sections adjacent to shingle areas. Make sure you identify which sections are shingle before you begin. Also, inspections done in the early morning are more comfortable and safer since the roof surface is cooler.
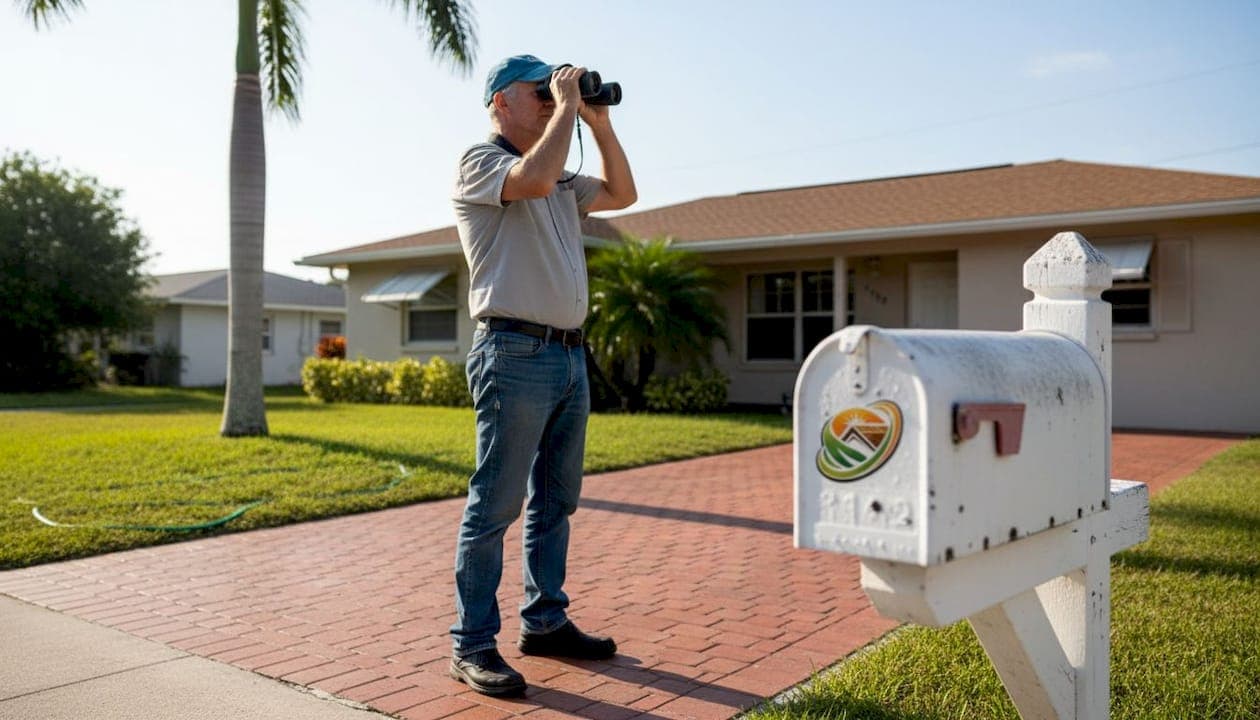
Pro Tip: Before climbing, use binoculars to do a full visual scan from the ground. You can often spot missing shingles, lifted edges, and algae streaking without ever leaving the driveway. This also helps you plan where to focus once you are on the roof.
Step-by-step roof damage assessment workflow
With your tools and safety precautions ready, let's walk through each stage of an effective roof inspection.
A methodical workflow helps identify issues early and gives you a clear record to act on. Follow these steps in order for the most complete assessment.
- Start with an interior check. Go into your attic with a flashlight. Look for water stains, daylight coming through the roof boards, or soft spots in the wood. Interior signs often reveal leaks that are invisible from outside.
- Do a ground-level exterior scan. Walk the perimeter of your home with binoculars. Look for missing shingles, dark streaks, lifted edges, and debris buildup in valleys.
- Inspect the gutters. Check for granule accumulation. A significant amount of granules in your gutters is a clear signal that your shingles are deteriorating.
- Access the roof safely. Use your ladder to reach the roof edge. Begin at the lowest point and work your way up systematically.
- Check flashing and seals. Inspect all metal flashing around chimneys, vents, and skylights. Cracked or lifted flashing is one of the most common leak entry points.
- Assess each roof section. Move across the roof in a grid pattern. Press gently on shingles to check for brittleness. Note any cracked, curling, or missing shingles.
- Photograph everything. Take wide shots for context and close-ups for detail. Date-stamp your photos.
- Record your findings. Write down the location, type, and severity of each issue before you leave the roof.
DIY vs. professional assessment:
| Factor | DIY assessment | Professional assessment |
|---|---|---|
| Cost | Free | Varies by provider |
| Accuracy | Good for visible damage | Catches hidden structural issues |
| Safety risk | Moderate | Low |
| Insurance documentation | Acceptable | Preferred by most insurers |
| Restoration recommendation | Limited | Detailed and actionable |
If you notice soft spots, sagging, or signs of structural damage, stop and call a professional immediately. These are not DIY situations.
Pro Tip: Take photos for insurance and restoration records. Insurers and restoration providers like us rely on dated photo evidence to process claims and plan restoration vs replacement recommendations quickly.
Documenting and reporting roof damage
Once you've assessed your roof, accurate documentation ensures you can act fast, whether for restoration or insurance.
Documentation helps insurance and restoration providers assess needs quickly and move your case forward without delays. A well-documented inspection report is one of the most powerful tools you have as a homeowner.
Best practices for documentation:
- Use a consistent format. Whether you use a notepad or a digital form, record the same details for each issue: location on the roof, type of damage, estimated size, and any related interior symptoms.
- Label your photos clearly. Name files by location, such as "north-slope-granule-loss" or "chimney-flashing-crack," so they are easy to reference later.
- Note the date and weather conditions. This context matters for insurance claims, especially after a named storm.
- Include interior findings. Attic photos showing water stains or daylight gaps strengthen your report significantly.
- Create a summary page. A one-page overview listing all issues, their locations, and your recommended next steps makes it easy for any provider to understand the scope quickly.
Studies on homeowner insurance claims show that thorough photo and written documentation can significantly increase the likelihood of claim approval and reduce back-and-forth with adjusters. When you use your inspection checklist consistently, you build a record over time that shows the progression of your roof's condition. This is especially valuable if you are making the case for restoration over full replacement.
Once your documentation is complete, share it with your insurance provider and your restoration specialist at the same time. This speeds up the process and ensures both parties are working from the same information.
Pro Tip: Use a free digital form app on your smartphone to fill out your inspection notes in real time while on the roof. You can attach photos directly and email the completed report to yourself and your provider in seconds. This eliminates the risk of losing handwritten notes.
Understanding the full restoration benefits available to you makes it easier to present a strong case for cost-effective repair rather than a costly full replacement.
Expert perspective: Why proactive roof assessment pays off in Florida
Most homeowners wait until there is a visible leak before they think about their roof. We understand why. Life is busy, and the roof feels like a problem for another day. But in South Florida, that mindset is expensive.
We have seen it many times. A homeowner skips one pre-storm inspection, a tropical system rolls through, and what would have been a $1,500 restoration becomes a $20,000 replacement. The damage was already there. The storm just finished it off.
What most quick-fix guides overlook is the insurance angle. Insurers in Florida are scrutinizing claims more carefully than ever. A roof with no documented inspection history is harder to claim on. But a homeowner who can show a consistent record of timely assessment and maintenance is in a much stronger position.
The Florida roof climate is genuinely different from the rest of the country. Proactive assessment is not optional here. It is the difference between a roof that lasts 15 more years and one that fails in the next hurricane season.
Get professional roof restoration before storm season
You now have the knowledge to assess your roof with confidence. But knowing what is wrong is only half the battle. Acting on it before storm season is what protects your home and your wallet.
At Shingle Roof Renewal, we serve homeowners across Palm Beach and Broward counties with certified restoration services backed by a 6-year transferable warranty. Whether you are in Boca Raton, Delray Beach, or Plantation, we can restore your aging shingle roof for a fraction of the cost of replacement using Fresh Roof's GreenSoy Technology. Do not wait for the next storm to make the decision for you. Contact us today for a free assessment and find out how much life is left in your roof.
Frequently asked questions
How often should I assess my roof in South Florida?
You should inspect your shingle roof at least twice a year and after major storms. Regular inspections are crucial in Florida's climate to catch problems before they escalate.
What signs mean my roof needs urgent attention?
Granule loss, missing shingles, leaks, and visible mold are all urgent signals. These typical damage signs mean you should schedule an assessment immediately, not at the end of the season.
Can I document roof damage myself for insurance?
Yes, clear photos and detailed written notes are accepted by most insurers. Documentation is essential for fast insurance processing and increases your chance of claim approval.
Is roof rejuvenation always cheaper than replacement?
In most cases, yes, especially when damage is caught early. Restoration saves thousands compared to full roof replacement and can add 10 to 15 years to your roof's lifespan.
Recommended
- Roof inspection checklist: save money, extend shingle life
- How Florida's climate impacts shingle roofs: what homeowners can do
- Top reasons to restore your roof instead of replace it
- Shingle Roof Renewal | Certified Fresh Roof Applicator | South Florida
- How to repair your storm damaged roof: step-by-step guide
- Gutter Replacement Steps for Florida Homeowners