

Start in the attic, not on the roof. That's the single biggest mistake homeowners make when chasing a leak: they grab a ladder before they've checked the one place that actually shows them where water is entering. Climb into your attic first, follow the wet trail to its highest point, then confirm what you find with a controlled water test before you call anyone.
Here are your three first moves, in order:
- Protect and document. Move belongings away from the wet area, catch dripping water in a bucket, and snap photos of any stains or damage right away.
- Check the attic. Grab a flashlight and look for the highest point of moisture, mold, or dark staining on the underside of the roof deck or insulation.
- Get a second set of eyes. Call a helper for a controlled hose test, or start scanning the exterior from the ground with binoculars if attic access isn't possible.
Pro Tip: Never climb a wet, steep, or storm-damaged roof by yourself. A pair of $20 binoculars from the ground will tell you almost as much as standing on the shingles, without the risk of a fall.
Key Takeaways
Roof leak detection works best when you start in the attic, trace water to its highest point, confirm with a controlled hose test, and prioritize flashing and penetrations over the open shingle field.
| Point | Details |
|---|---|
| Start inside, not outside | Check the attic first and trace stains to the highest wet point before touching a ladder. |
| Confirm with a hose test | Soak the roof in low bands from the eave upward with a helper watching inside. |
| Prioritize penetrations | Check pipe boots, flashing, and valleys before assuming shingle field damage. |
| Know your tool limits | Moisture meters and infrared cameras lose accuracy once a leak dries out. |
| Watch for the pro triggers | Sagging decks, recurring leaks, and mold growth mean it's time to call a professional. |
Table of Contents
- How to Spot Early Signs of a Roof Leak
- Start Inside: A Step-By-Step Attic Diagnostic Checklist
- The Controlled Water Test: How to Pinpoint an Active Leak
- Safe Exterior Checks You Can Do From the Ground
- Most Common Leak Sources to Check First
- Tools That Help Find Hidden Leaks (and Their Limits)
- When to Call a Roofing Professional
- Prevention Beats Detection: What Early Action Saves You
- An Editor's Take on the Attic-First Approach
- Sources
How to Spot Early Signs of a Roof Leak
Most roof leaks announce themselves quietly for weeks before anyone notices a drip. Catching those quiet signals is what separates a $300 repair from a $3,000 one.
Inside your home, watch for these clues:
- Yellow or brown rings on ceilings or upper walls, especially ones that grow after rain
- Bubbling or peeling paint near ceiling lines
- A persistent musty smell in a bedroom or hallway closet
- Insulation in the attic that feels damp, matted, or compressed
- Rusted nail heads poking through the roof deck, or dark mold spots on rafters
From outside, look for missing or curling shingles, granules piling up in your gutters like coarse sand, cracked or rusted flashing around chimneys and vents, and gutters clogged enough to back water up under the roofline.
Flashing and roof penetrations deserve special attention. Experts who map leak-prone zones report that most residential leaks trace back to flashing, penetrations, or material transitions rather than damage across the open shingle field. That single fact should shape where you look first, both inside and outside.
Start Inside: A Step-By-Step Attic Diagnostic Checklist
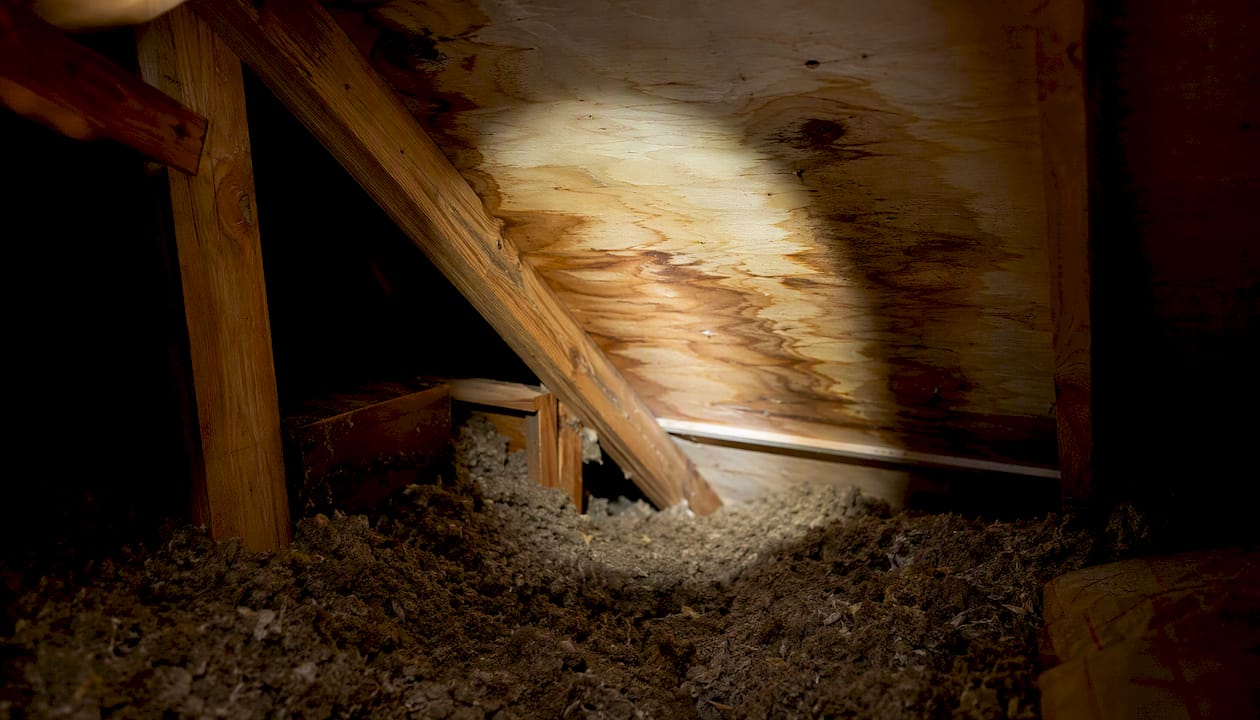
Your attic is the most honest witness you have. Water leaves a trail there long before it ever shows up on a ceiling downstairs, and tracing that trail to its highest point is the fastest way to narrow down where the roof itself is failing.
Before you go up, run through a quick safety check: wear old clothes and a dust mask, bring a bright flashlight or headlamp (not just your phone), and step only on ceiling joists or a stable walk board, never on the insulation between them. If your attic has no safe flooring, no lighting, or signs of structural sag, stop and call a professional instead of improvising.
Once you're safely positioned, work through these steps:
- Scan for staining first. Sweep your flashlight slowly across the underside of the roof deck and rafters, looking for dark streaks, mold, or watermarks.
- Follow the trail uphill. Water runs downhill along rafters and sheathing, so the actual leak is almost always higher up the slope than the stain you first spot.
- Check insulation condition. Damp, flattened, or discolored insulation marks a slow, ongoing leak rather than a one-time event.
- Look for daylight. On a sunny day, tiny pinpricks of light through the roof deck reveal gaps around nail holes or deteriorated sheathing.
- Inspect around every penetration. Vent pipes, chimneys, and skylights all pierce the roof deck, and each one is a potential entry point worth close inspection.
- Record fixed-point measurements. Note how many feet the wet spot sits from a vent pipe, gable end, or chimney so you can find the same spot from outside.
That last step matters more than people expect. Without a reference point, you'll stand on a ladder guessing at a location that could be five feet off in either direction.
Pro Tip: Take a photo of the stain next to a tape measure showing its distance from the nearest vent pipe. That single picture saves a roofing pro real time, and time is money on a service call.
The Controlled Water Test: How to Pinpoint an Active Leak
When the attic trail goes cold, or you want to confirm a suspected spot before repairs, a controlled hose test remains one of the most reliable diagnostic methods available to homeowners. Industry guidance on leak testing recommends a slow, methodical approach rather than blasting the whole roof at once.
Here's how to run it correctly:
- Set up your team. Put one person in the attic with a phone or radio, watching the suspected area, and one person on the ground with a garden hose fitted with a low-pressure nozzle.
- Pick calm weather. Wind can push water sideways and mislead your results, so choose a still day.
- Start low on the slope. Soak a 3 to 4 foot band of roof near the eave for 5 to 10 minutes before moving anywhere else.
- Move uphill only if nothing happens. If no drip appears after 10 minutes, move the hose up another band and repeat.
- Signal the moment water appears. The person inside calls out or texts the instant a drip starts, and you stop spraying immediately.
Never spray uphill of your target area or crank the nozzle to high pressure. Forcing water under shingles from the wrong angle creates a false positive that sends you chasing a leak that doesn't exist. Once you isolate the band that triggers the drip, you've found your search zone. That's your cue to inspect that exact section closely for cracked flashing, a failed pipe boot, or lifted shingles.
Safe Exterior Checks You Can Do From the Ground
You don't need to walk your roof to gather useful evidence. A pair of binoculars and a working ladder cover most of what a homeowner safely needs to check.
Start from the ground. Scan the ridge line, valleys, flashing, and any spot where shingles look lifted, cracked, or missing entirely. Check your gutters for granule buildup, which looks like coarse black or gray sand and signals shingles nearing the end of their protective life.
If you're comfortable on a ladder and have someone spotting you, use it to get closer to the eaves and low-slope flashing, not to walk across the roof itself. From that vantage point, look closely at:
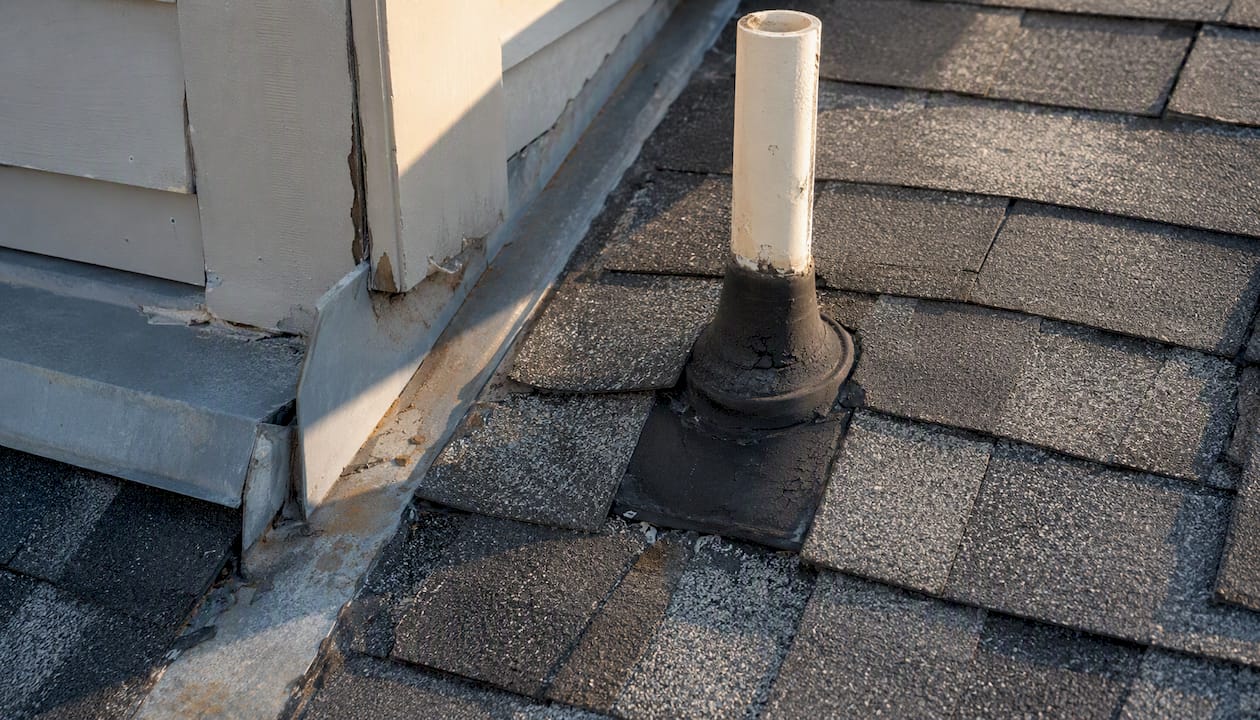
- Pipe boots, where the rubber collar around vent pipes cracks and shrinks with age
- Chimney counter-flashing, checking for gaps, rust, or separation from the masonry
- Skylight seals, where caulking dries out and pulls away over time
- Kick-out flashing, the small diverter piece where a roof edge meets a sidewall
Take time-stamped photos of anything suspicious. Insurance adjusters and roofing professionals both move faster with clear, dated images in hand instead of a verbal description of "some cracked stuff near the chimney." For a fuller ground-level walkthrough, see this guide on spotting roof damage before you decide your next step.
Pro Tip: Photograph the same four roof corners every time you inspect, even when nothing looks wrong. Comparing photos over months makes small changes, like a slowly lifting shingle tab, obvious in a way a single glance never will.
Most Common Leak Sources to Check First
Not every square foot of your roof carries equal risk. Some spots fail constantly; others almost never do. Knowing the difference tells you where to spend your inspection time.
- Pipe and vent boots. The rubber or neoprene collar around plumbing vents dries out and cracks with age, and pipe boots together with flashing account for a large share of all residential roof leaks, according to roofing repair data.
A cracked vent boot is often a quick, affordable fix. Widespread flashing failure, soft or rotted decking, or a leak that keeps returning after repairs are red flags that call for a professional rather than another DIY patch. Reinforcing that priority order, flashing and penetration failures consistently outrank shingle-field wear as the leading cause of leaks industry-wide, which is exactly why your inspection time should start there, not in the open field of shingles.
Tools That Help Find Hidden Leaks (and Their Limits)
You don't need professional-grade equipment to run a solid first-pass inspection, but knowing what each tool actually does helps you avoid wasted effort.
- Flashlight or headlamp. Cheap, essential, and the single most useful tool for attic work.
- Binoculars. Let you inspect the roof surface from the ground without climbing anything.
- Moisture meter. Pin-style meters puncture material to measure moisture content directly; pinless meters scan without damage but read less precisely through thick materials.
- Infrared (thermal) camera. Detects temperature differences that can indicate trapped moisture, but only if the leak is recent and the area hasn't fully dried out.
| Tool | Cost | Accuracy | DIY-friendliness | Best use |
|---|---|---|---|---|
| Flashlight/binoculars | Low | Moderate (visual only) | High | First-pass attic and ground inspection |
| Moisture meter | Low to moderate | Good on damp materials | Moderate | Confirming active moisture in insulation or decking |
| Infrared camera | High | Best when used by a trained eye | Low | Locating hidden moisture pockets after a recent leak |
The catch with every tool on that list is timing. Thermal cameras and moisture meters lose accuracy fast once an area dries out, which is exactly why professionals often prefer to test during or right after rainfall, or use an active moisture-mapping approach instead of scanning a bone-dry roof days later. That's also why the attic walkthrough and the controlled hose test described earlier stay essential even if you own a thermal camera. Tools support the investigation; they don't replace it.
When to Call a Roofing Professional
Some situations move past DIY territory the moment you spot them. Call a professional right away if you notice:
- Sagging in the roof deck or ceiling, which can signal structural damage
- Standing water or active puddles in the attic
- Staining that spans multiple rooms or keeps spreading
- Visible mold growth beyond a small, isolated spot
- A leak that returns after you've already patched it
- A roof pitch too steep or too high for safe ladder access
- A leak source you still can't identify after the attic check and hose test
A qualified inspector will typically run a full attic and roof survey, use moisture mapping or infrared scanning where useful, document everything with photos, and hand you a written repair scope with cost estimates. Ask about their inspection process, whether they use moisture or IR scanning, what photo evidence they'll provide, and what warranty backs their repair work.
Before the appointment, gather your own photos, the fixed-point measurements from your attic check, and the date of the last major storm. That prep turns a 90 minute inspection into a focused 30 minute conversation. For readers weighing repair against a bigger decision, this roof problem-solving guide covers common fixes and where the line sits between patch and replace.
Prevention Beats Detection: What Early Action Saves You
Finding a leak early is only half the win. What you do with that information determines whether you're looking at a $300 repair or a $20,000 replacement three years from now.
Catching problems while shingles are still structurally sound, just dried out, cracked, or losing granules, keeps your options open. Once decking rots or insulation stays wet long enough to breed mold, replacement becomes the only realistic path.
That's the gap Shingleroofrenewal exists to fill. Rather than jumping straight to a tear-off quote, Shingleroofrenewal inspects your roof, assesses its actual condition, and determines whether it still qualifies for preservation using certified Fresh Roof Green Soy Technology, which restores flexibility to aging asphalt shingles and helps lock in granules that are already loosening.
- Roofs with widespread cracking, curling, or granule loss but no structural rot are typically strong preservation candidates.
- Roofs with sagging decking, extensive rot, or repeated active leaks generally need full replacement instead.
- Preservation only makes sense before deterioration crosses that structural line, which is why early detection and a quick assessment matter so much.
Pro Tip: If your roof is over 10 years old and showing granule loss but no active leak yet, that's the ideal window to get it assessed for preservation rather than waiting for a leak to force the decision.
For homeowners who want a broader prevention framework, this guide to preventing roof leaks walks through the maintenance habits that keep small problems from becoming big ones.
If your roof shows the wear signs covered in this guide, curling shingles, granule buildup, minor cracking, but no active structural damage, it's worth finding out whether preservation is still on the table before you get a replacement quote. Shingleroofrenewal offers a free roof assessment to determine exactly that, and qualifying roofs can save homeowners a substantial amount compared to full replacement, backed by a 6-year transferable warranty. Homeowners in the Delray Beach area can see local service details at the Delray Beach preservation page, and Plantation-area homeowners can check the Plantation service page for the same qualification process. Call us before you call the roofer.
An Editor's Take on the Attic-First Approach
Most roof leak advice online still leads with the roof itself: climb up, look at the shingles, guess where water got in. That order is backward, and it's why so many homeowners chase phantom leaks for months. The attic tells you more in five minutes than a rooftop scan tells you in an hour, because water leaves a physical trail indoors that the wind and sun haven't erased yet.
The conventional wisdom also oversells expensive tools. An infrared camera in untrained hands, pointed at a roof that dried out three days ago, produces confident looking nonsense as often as it produces answers. A flashlight, a tape measure, and a garden hose used correctly beat a thermal camera used carelessly, every time.
If there's one thing homeowners should prioritize differently, it's this: stop treating leak detection and roof replacement as the same decision. They aren't. A cracked pipe boot on an otherwise sound roof is a $300 problem being treated like a $20,000 one, and that gap is where preservation earns its place in the conversation.
Sources
These sources back the diagnostic steps and statistics covered above:
- How to Detect and Address a Roof Leak A Homeowners Guide - GAF
- Roof leak cause determination - NRCIA
- Common Roof Leak Locations: 8 Critical Areas Experts Check - Ridgeline Construction Roofing & Exteriors
- Roof Leak Repair | Where Leaks Start & How to Catch Them - Premium Roofing Corp
- Roof leaks: diagnosis & repair guide - Inspectapedia