

If you spot a leak, your first move is to stop the water, not climb the roof. Place buckets, move valuables, and check your attic immediately for wet insulation or daylight coming through the deck. That single sequence, done in the first 30 minutes, limits damage and gives you the documentation you need for insurance or a preservation qualification.
Quick-action checklist for the first hour:
- Stay safe first. Do not climb a wet, icy, or steep roof. Ladder falls are the leading cause of DIY roofing injuries.
- Stop the water inside. Redirect drips with buckets or plastic sheeting over furniture and flooring.
- Check the attic. Look for water staining, wet insulation, mold, or visible daylight through the decking.
- Photograph everything. Date-stamp every photo. Insurers and preservation specialists both need this record.
- Apply a temporary tarp if the breach is accessible from the ground or a safely positioned ladder, and the weather allows.
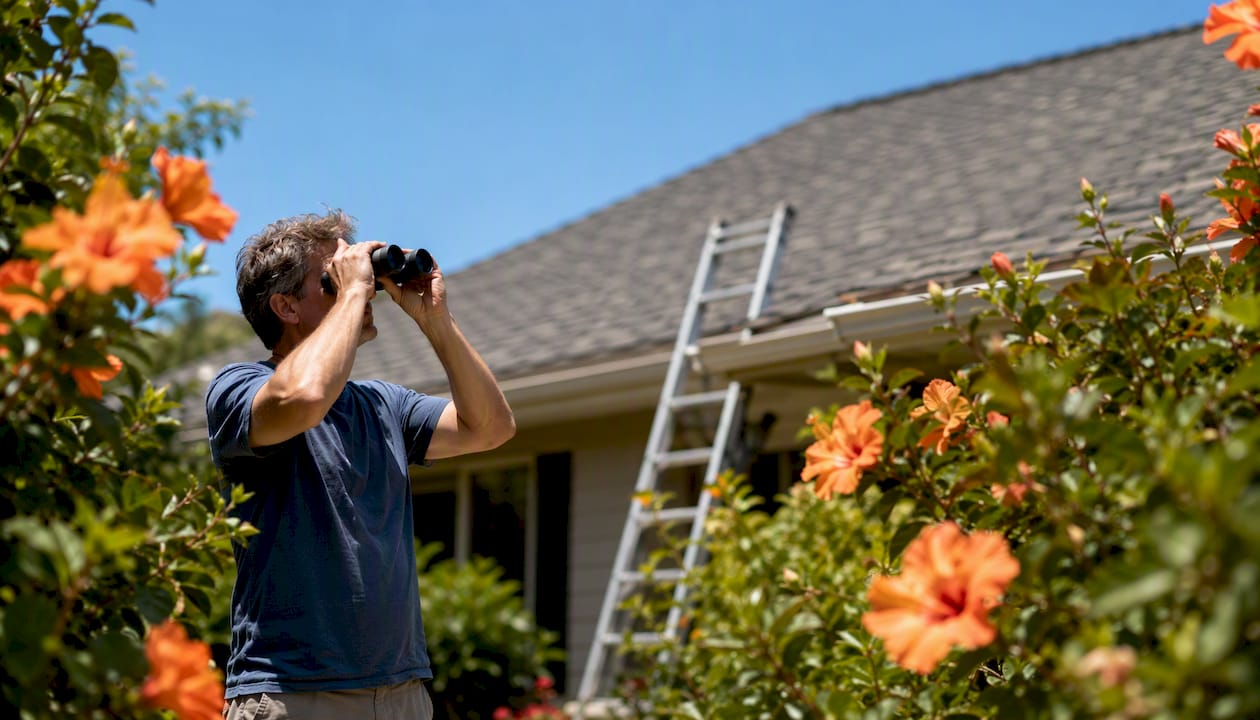
- Document the exterior from the ground. Use binoculars to identify missing shingles, lifted tabs, or damaged flashing without stepping on the roof.
- Call a preservation specialist or licensed roofer depending on severity. Minor surface issues may qualify for preservation; structural damage requires a contractor.
Your manufacturer warranty (GAF, CertainTeed, IKO, and others) may have specific inspection and documentation requirements. Failing to document a problem promptly can affect a claim. Building codes in most U.S. jurisdictions also reference ASHRAE 62.2 ventilation standards, so attic airflow issues discovered during your check are worth noting separately.
Pro Tip: Shingleroofrenewal offers a free roof assessment to determine whether your roof qualifies for preservation before you spend a dollar on repairs or replacement. Schedule it before the damage spreads.
Table of Contents
- What are the most common roofing problems you should know about?
- How to inspect your roof safely without causing new damage
- Safe DIY repairs for small issues — and when to stop
- Why you should never pressure-wash shingles, and what to do instead
- When to call a professional, what to ask, and what to expect
- A simple seasonal maintenance schedule that adds years to your roof
- Key Takeaways
- Why preservation should come before replacement
- Your roof may qualify for preservation before you need a roofer
- Useful sources and further reading
What are the most common roofing problems you should know about?
Knowing what you are looking at is half the battle. These are the failures that show up most often on asphalt shingle roofs, what causes them, and how urgently each one needs attention.
| Problem | Visual clues | Likely cause | Triage priority |
|---|---|---|---|
| Active leak | Water stains on ceiling, wet insulation | Flashing failure, cracked boot, open seam | Urgent — call pro |
| Missing/broken shingles | Bare deck patches, shingle pieces in yard | Wind, impact, age-related brittleness | Schedule soon |
| Ponding/pooling water | Standing water after rain, sagging low spots | Poor drainage, clogged gutters, deck deflection | Urgent — call pro |
| Cracked/blistered surface | Bubbles, surface cracks, rough texture | Heat, moisture trapped under shingle, age | Monitor / preserve |
| Flashing failure | Rust streaks, lifted metal, gaps at chimney | Sealant failure, improper install, age | Schedule soon |
| Clogged gutters | Overflow, plant growth, granule buildup | Debris accumulation, no gutter guards | Schedule soon |
| Ventilation problems | Hot attic, frost in winter, curling shingles | Blocked soffits, insufficient ridge vents | Schedule soon |
| Tree/impact damage | Dents, punctures, broken branches on roof | Storm, overhanging limbs | Urgent — call pro |
| Algae/moss | Black streaks (algae), green/gray mat (moss) | Shade, moisture, organic debris | Monitor / treat |
| Hail/penetration | Circular dents, granule loss in pattern | Hailstorm, falling debris | Urgent — call pro |
A few of these deserve extra context.
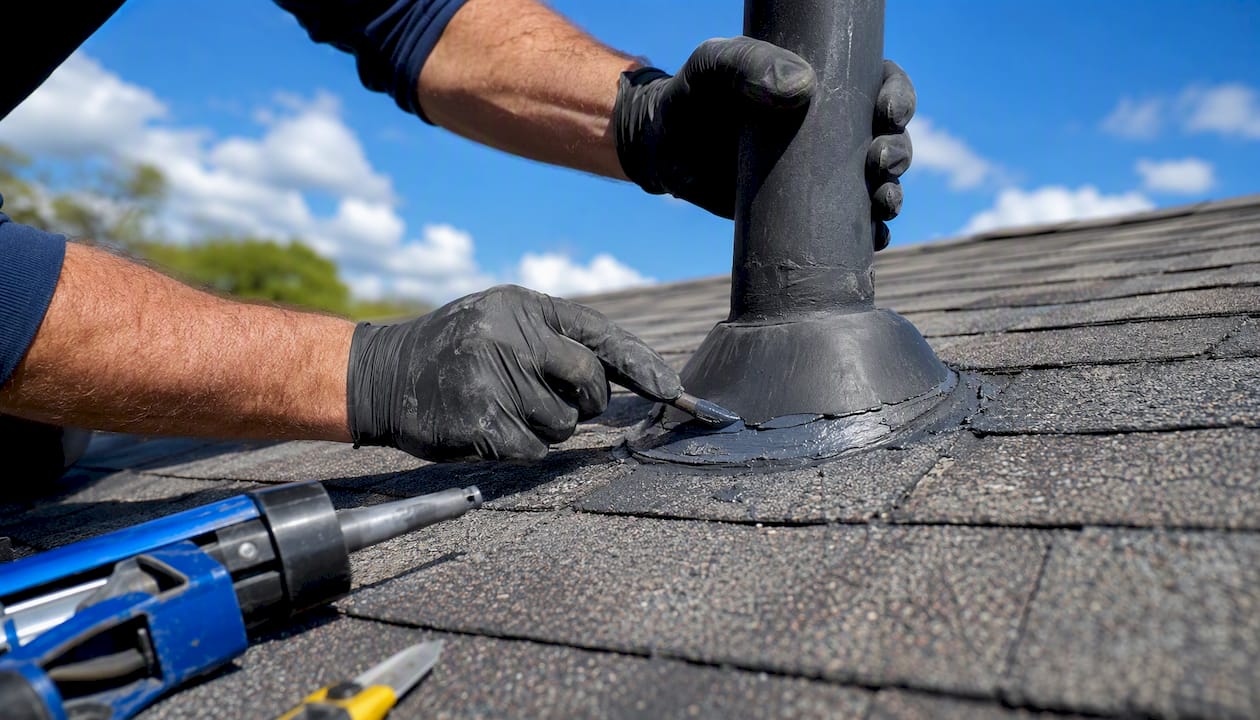
Flashing failures account for a disproportionate share of leaks. Rubber vent pipe boots commonly crack around years 8–10, and flashing at chimneys, skylights, and valleys is where water finds its way in most often. Caulking over a cracked boot is a short-term patch at best. Replacing the boot is the right fix.
Algae vs. moss are not the same problem. Black streaks are typically Gloeocapsa magma algae, which is mostly cosmetic. Moss, on the other hand, holds moisture against the shingle surface and physically lifts tabs over time, creating a real structural threat. The six failure systems that shorten an asphalt roof's life are granule loss, self-seal strip failure, moss and algae, flashing, attic ventilation, and fasteners. Staying ahead of all six is what gets a roof to its rated lifespan.
Granule loss matters for two reasons: it shortens the shingle's UV protection and it can affect your manufacturer warranty. If you see heavy granule buildup in the gutters or bare patches on shingles, document it with photos before cleaning. That record supports both a warranty inquiry and a preservation qualification.
Insurance note: Storm-related damage (hail, wind, impact) is typically a covered peril under standard homeowner policies. Document the date of the storm, photograph damage the same day if safe, and file promptly. Delayed documentation weakens claims.
How to inspect your roof safely without causing new damage
The safest inspection starts from the ground and works inward. Inspect twice a year, ideally in spring and fall, and always within 48 hours after a major storm. GAF recommends annual inspections at minimum, with post-storm checks as a non-negotiable habit.
Ground-level inspection (always start here)
Stand at each corner of the house with binoculars. You are looking for:
- Missing, lifted, or curled shingles
- Sagging sections along the ridgeline or field
- Discoloration, dark streaks, or moss patches
- Granule loss visible as bare or shiny spots
- Damaged or displaced flashing at chimneys and vents
- Gutters pulling away from the fascia or visibly full of debris
A straight ridgeline is a healthy sign. Any visible sag or wave is a red flag that warrants a professional evaluation.
Ladder inspection (when it is appropriate)
A ladder check at the eave is reasonable for most homeowners on a dry, calm day. Use a stable extension ladder rated for your weight, have a second person hold the base, and never lean out past your hips. What you can safely examine from the top of the ladder: gutter condition, lower-course shingles, fascia boards, and the first few feet of flashing at the eave.
Do not walk on the roof if shingles are hot (above 90°F), wet, icy, or visibly brittle. Hot asphalt shingles compress and crack under foot traffic, and the damage may not be visible until weeks later.
Inspect your attic immediately after any heavy rain. Water staining on the underside of the deck, wet or compressed insulation, mold growth, and visible daylight through the boards are all high-severity findings. An attic check often reveals a leak weeks before it shows up as a ceiling stain inside the living space.
Photo documentation checklist
Good photos protect you. For each problem area, capture:
- A wide shot showing the location on the roof
- A close-up of the damage itself
- The date and time (use your phone's automatic metadata or hold a dated notepad in frame)
- Any granule accumulation in gutters (scoop a handful and photograph it)
Keep these photos in a dedicated folder labeled by date. Insurers, contractors, and preservation specialists all ask for this record. A post-storm inspection checklist tailored to South Florida conditions can help you stay organized after hurricane-season events.
Pro Tip: Check your attic on a bright sunny day with the lights off. Any pinpoints of light coming through the decking mean the deck has a gap or hole. That is a call-a-pro finding, not a DIY fix.
Safe DIY repairs for small issues — and when to stop
The best roof repair advice is also the most honest: most homeowners can handle three specific fixes safely. Everything else should wait for a professional.
The three DIY repairs worth attempting:
- Press-sealing a lifted shingle tab on a warm day (above 70°F so the sealant bonds)
- Replacing a single cracked pipe boot when the boot is accessible and the surrounding deck is solid
- Installing a temporary tarp over an active breach to stop water entry until a pro arrives
Step-by-step: press-sealing a lifted tab
- Gather materials: roofing cement (Henry 208 or equivalent), a putty knife, and disposable gloves.
- Wait for a dry day with temperatures above 70°F.
- Gently lift the tab just enough to apply sealant. Do not force a cold or brittle shingle.
- Apply a quarter-size dab of roofing cement under the tab with the putty knife.
- Press the tab firmly down and hold for 30 seconds.
- Check the surrounding shingles for similar lifting while you are there.
- Photograph the repair with a date stamp.
Total time: 15–20 minutes. Difficulty: low, provided the shingle is pliable and the roof pitch is walkable.
Step-by-step: temporary tarp installation
- Materials: heavy-duty polyethylene tarp (6-mil minimum), 2x4 lumber, roofing nails or sandbags.
- Position the tarp so it extends at least 4 feet past the damaged area on all sides and over the ridge if possible.
- Secure the uphill edge by wrapping it around a 2x4 and nailing the board to the deck. Do not nail through the tarp alone.
- Weight or nail the downhill edges. Avoid puncturing the tarp unnecessarily.
- Check the tarp after any wind event and re-secure as needed.
This is a stabilization measure, not a repair. Family Handyman's guidance on DIY triage confirms that temporary tarps are appropriate for active leaks while you wait for professional assessment.
When to stop and call a pro
Stop the DIY work immediately if you find any of the following:
- Soft or spongy decking underfoot (deck rot)
- A sagging section anywhere on the roof
- More than one leak source
- Visible daylight through the deck boards in the attic
- Flashing that has separated from the wall or chimney
- Shingles that crumble or crack when you touch them
These conditions exceed DIY scope. Continuing to work on a structurally compromised roof risks injury and can make the damage worse.
Pro Tip: Never substitute caulk for a flashing repair. Caulk over failed step flashing at a chimney will hold for one season at best. The right fix is replacing the flashing, which requires a professional.
Why you should never pressure-wash shingles, and what to do instead
Do not pressure-wash asphalt shingles. The mechanism is straightforward: high-pressure water physically strips the mineral granules embedded in the shingle surface. Those granules block UV radiation. Once they are gone, the asphalt underneath degrades faster, and the roof's rated lifespan shortens. IKO's maintenance guidance is explicit on this point, noting that pressure washing can void manufacturer warranties in addition to accelerating wear.
Safe cleaning methods for asphalt shingles:
- Soft-wash for algae: The Asphalt Roofing Manufacturers Association (ARMA) references a 50:50 sodium hypochlorite (bleach) and water solution applied at low pressure as the accepted method for removing Gloeocapsa magma algae. Apply, let dwell, and rinse gently. Do not scrub.
- Manual removal for moss: Use a soft-bristled brush to loosen moss, working downhill (never uphill, which lifts tabs). Professional soft-wash or careful manual removal is the recommended approach for significant moss growth.
- Prevention after cleaning: Zinc or copper ridge strips release ions that inhibit algae and moss regrowth every time it rains. This is a low-cost, long-term prevention measure.
- Tree trimming: Keep overhanging branches at a safe distance from the roof surface to reduce debris and moss risk. Branches deposit debris, hold moisture, and accelerate organic growth.
Where preservation fits in
Cleaning removes surface contamination. Preservation goes deeper. Shingleroofrenewal's certified Fresh Roof Green Soy Technology works at the molecular level to restore flexibility to dried-out asphalt shingles, lock in remaining granules, and slow the brittleness that Florida's sun and heat accelerate. This is not a cleaning service and not a standard rejuvenation product. It is a qualification-based preservation treatment.
To determine whether a roof qualifies, a certified applicator evaluates:
- Decking condition (no rot, no structural deflection)
- Flashing integrity at all penetrations
- Remaining granule coverage across the field
- Shingle flexibility and surface condition
- Age and installation history
What documentation should you collect before a preservation assessment? Gather dated inspection photos, any existing warranty paperwork from your shingle manufacturer, records of past repairs, and notes from your most recent attic check. This gives the applicator a complete picture and speeds up the qualification process.
A roof that qualifies for preservation can extend its serviceable life significantly, at a fraction of the cost of replacement. A roof that does not qualify gets an honest recommendation for the next step. That transparency is the point. For more on how roof chemicals protect shingles at the surface level, the Shingleroofrenewal blog covers the science in plain language.
When to call a professional, what to ask, and what to expect
Three findings mean you call a professional today, not next week:
- Structural sag anywhere along the ridgeline, hips, or field
- Active widespread leaks with multiple ceiling stains or wet insulation in more than one attic bay
- Deck rot or visible daylight through the boards when you check the attic
Beyond those triggers, schedule a professional inspection if you have three or more of the replacement-grade signs identified by roofing industry sources: sagging, daylight through the deck, multiple leak stains, widespread granule loss, or multiple layers of old shingles. When three or more of these signs are present, repair is usually less cost-effective than replacement.
Questions to ask any contractor or preservation specialist:
- What is the full scope of work, and what is excluded?
- Can you provide a written, itemized estimate?
- What materials will you use, and are they manufacturer-approved?
- What warranty comes with the work, and is it transferable?
- What is the expected timeline from start to completion?
- Will you photograph the work before, during, and after?
- Are you licensed and insured in this state?
Cost and timeline expectations
Minor repairs (single flashing replacement, pipe boot swap, small patch) typically run a few hundred dollars and take a few hours. A full replacement on an average U.S. home runs $15,000–$30,000 depending on size, materials, and region. Preservation, for a qualifying roof, sits well below that range and can extend serviceable life by years. Get at least two written estimates before committing to any major work.
Insurance documentation tips
- File storm-damage claims promptly. Most policies require notice within a reasonable time after the event.
- Provide dated photos taken before and after the storm.
- Keep a written log of inspection dates, findings, and any repairs made.
- Ask your insurer whether a preservation treatment affects your coverage or premium.
A preservation qualification report from a certified applicator can serve as documentation of the roof's condition at a specific date, which is useful for both insurers and future buyers. For a broader look at cost-effective ways to extend shingle roof life, the Shingleroofrenewal blog walks through the preservation-versus-replacement calculus in detail.
Pro Tip: Ask every contractor for their license number and verify it with your state's contractor licensing board before signing anything. In Florida, roofing contractors must hold a state-issued license.
A simple seasonal maintenance schedule that adds years to your roof
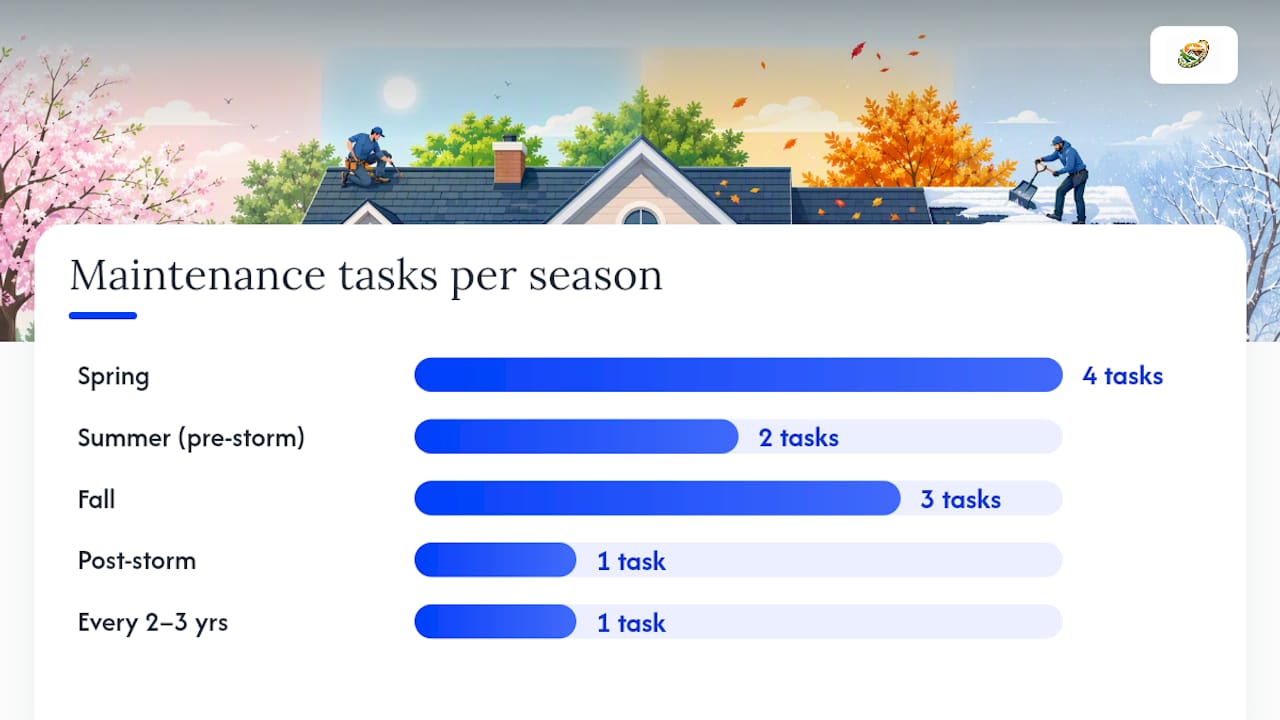
The ideal cadence is twice a year, spring and fall, plus a check within 48 hours after any major storm. That schedule, combined with a few targeted tasks, is what separates a roof that reaches its rated lifespan from one that fails early.
| Season | Task | Why it matters |
|---|---|---|
| Spring | Full ground-level inspection; check for winter damage | Catch freeze-thaw damage before summer heat sets in |
| Spring | Clean gutters and downspouts | Remove winter debris; prevent ponding at eaves |
| Spring | Trim overhanging branches (6–10 ft clearance) | Reduce debris, shade, and moss risk |
| Spring | Check attic ventilation (soffit and ridge vents clear) | Balanced airflow prevents heat-cooking of shingles |
| Summer/Pre-storm | Inspect flashing at all penetrations | Heat expands and contracts sealants; check before storm season |
| Summer/Pre-storm | Photograph current roof condition | Baseline documentation before storm season |
| Fall | Full ground-level inspection | Identify summer wear before winter weather arrives |
| Fall | Clean gutters again | Remove leaf buildup before rainy season |
| Fall | Attic check for moisture or mold | Catch any summer leaks before they worsen |
| Post-storm | Inspect from ground within 48 hours | Document any new damage for insurance promptly |
| Every 2–3 years | Professional or preservation specialist inspection | Catch what ground checks miss; qualify for preservation |
For storm-prone and hot climates
In South Florida, the pre-storm window (May through June) is the highest-value maintenance period. Shingles dried out by months of intense UV exposure are more vulnerable to wind uplift. An attic ventilation check in spring, specifically confirming that soffit intake vents are not blocked by insulation and that ridge vents are clear, is one of the highest-leverage tasks a homeowner can do. Salt-air environments (coastal Broward and Palm Beach counties) also accelerate metal flashing corrosion, so flashing inspections should happen every spring without exception.
Following this schedule creates a dated maintenance record. That record supports manufacturer warranty claims, insurance documentation, and preservation qualification. A roof longevity checklist from Shingleroofrenewal can help you track each task by season.
Key Takeaways
Catching a roof problem early and responding correctly, whether with a safe DIY fix, a preservation treatment, or a professional repair, is what separates a $300 repair from a $25,000 replacement.
| Point | Details |
|---|---|
| Inspect twice a year | Spring and fall inspections, plus post-storm checks, catch problems before they compound. |
| Never pressure-wash shingles | High-pressure water strips granules, shortens roof life, and can void manufacturer warranties. |
| Three red flags mean call a pro today | Structural sag, visible daylight through the deck, and active widespread leaks all exceed DIY scope. |
| Document everything with dated photos | Dated photos support insurance claims, warranty inquiries, and preservation qualification. |
| Shingleroofrenewal offers a free assessment | A free inspection determines whether your roof qualifies for preservation before replacement is considered. |
Why preservation should come before replacement
Most homeowners call a roofer the moment they see a problem. That instinct is understandable, but it often skips a step that could save thousands of dollars.
Inspection and preservation come first because replacement is irreversible and expensive. A full asphalt shingle replacement typically runs $15,000–$30,000. For a roof that still has structural integrity but is showing age-related wear, that cost is often premature. Shingleroofrenewal's preservation process starts with an honest assessment: inspect the roof, evaluate the decking, flashing, and granule coverage, and determine whether the shingles can be restored rather than replaced.
The proof points are straightforward. Qualifying roofs treated with Fresh Roof Green Soy Technology can see their serviceable life extended by years, at a fraction of replacement cost. The work is backed by a 6-year transferable warranty, which also adds value at resale. And every roof that does not go to the landfill is a real environmental benefit.
That said, preservation is not always the answer. When a roof shows structural deck failure, active sagging, or surface failure across more than 75% of the field, replacement is the right call. We say that clearly during every assessment. The goal is not to sell a treatment. The goal is to give you the right answer for your specific roof.
Your roof may qualify for preservation before you need a roofer
Most homeowners in South Florida spend $15,000–$30,000 on a full roof replacement without ever finding out whether their roof could have been preserved instead. Shingleroofrenewal exists to close that gap.

We offer a free roof assessment for homeowners in Palm Beach and Broward counties. Our certified applicators inspect your roof, evaluate its condition, and tell you honestly whether it qualifies for preservation using Fresh Roof Green Soy Technology. No pressure, no upsell.
What the process looks like:
- Inspect: We examine your roof from the ground and with a close-up assessment of shingles, flashing, and decking.
- Assess: We document granule coverage, shingle flexibility, and structural condition with photos and notes.
- Qualify or redirect: If your roof qualifies, we explain the preservation treatment and what it costs. If it does not, we tell you that too and explain why.
What qualifying homeowners get:
- Potential savings of up to 80% compared to full replacement
- Restored shingle flexibility and reduced granule loss
- Improved wind and fire resistance
- A 6-year transferable warranty on qualifying projects
- One less roof in the landfill
We serve homeowners across South Florida, including Delray Beach and Plantation. If you are in Palm Beach or Broward County and your roof is showing signs of age, the right first call is a free inspection with Shingleroofrenewal, not a roofer.
Useful sources and further reading
The guidance in this article draws from manufacturer maintenance documentation, industry checklists, and preservation-specialist experience. These primary sources are worth reading directly.
- Roof maintenance tips for homeowners | IKO
- Annual maintenance and roofing tips for every homeowner | GAF
- Asphalt roof maintenance: checklist to extend life | The Roofing Brief
- 10 signs you need a new roof | The Roofing Brief
- What type of maintenance does my roof require? | CertainTeed
- 10 roof problems and what to do about them | Family Handyman
Keep your inspection photos and dates. A simple folder on your phone or computer, organized by date, is enough. That record is your first line of defense for warranty claims, insurance documentation, and preservation qualification.