

TL;DR:
- Following manufacturer and code steps ensures your asphalt shingle roof lasts longer and maintains warranty coverage. Proper preparation, correct material use, meticulous installation, and ongoing maintenance prevent leaks and premature failure. Attic ventilation and regular inspections are essential to extend your roof's lifespan significantly.
Shingle installation instructions are the manufacturer and code-mandated steps that determine whether your asphalt shingle roof lasts 20 years or 30. Following them precisely protects your warranty, keeps your home watertight, and prevents the kind of premature failure that sends homeowners straight to a $15,000 replacement. The 2024 International Residential Code sets the legal floor for fastener type, nail count, underlayment overlap, and slope requirements. Skip any of those details, and you are not just risking leaks. You are voiding coverage before the first rainstorm hits.
What materials and tools do you need before installing asphalt shingles?
Gathering everything before you climb onto the roof is the single step most DIYers skip. Running back to the hardware store mid-job causes rushed decisions and installation errors that show up as leaks two years later.
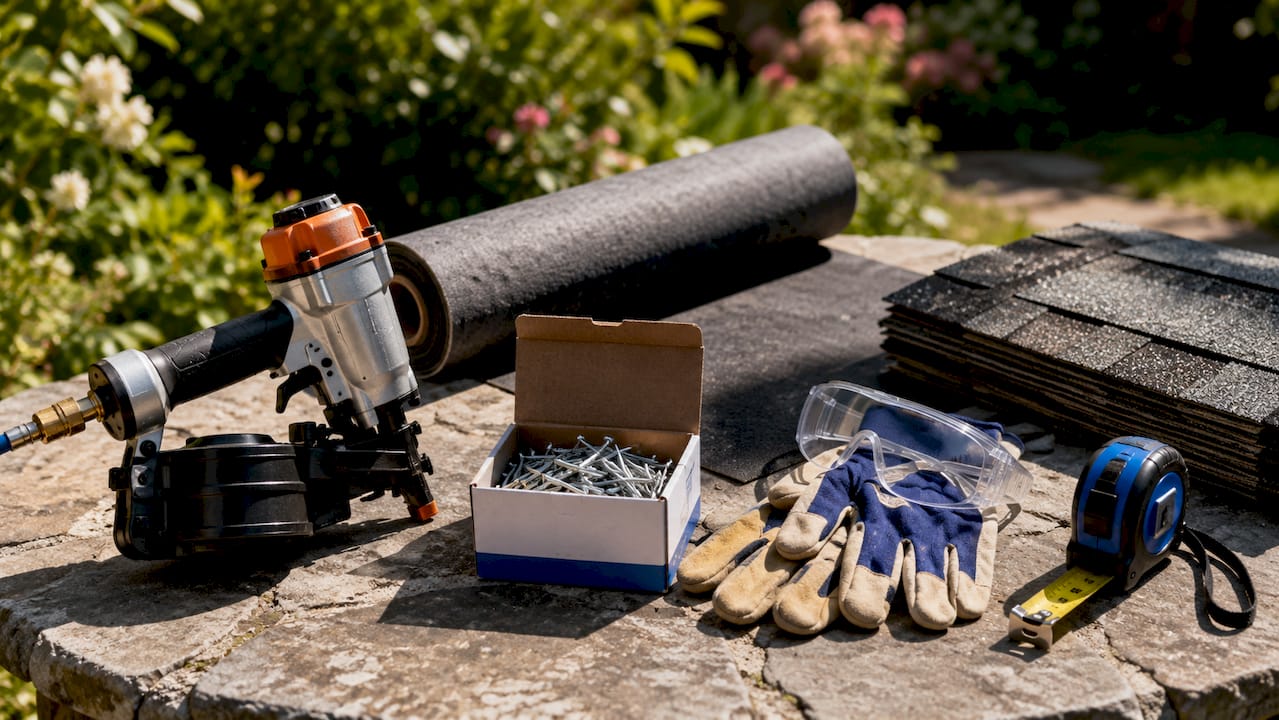
Shingles and fasteners
Three-tab and architectural (laminate) shingles are the two most common asphalt options for residential roofs. Architectural shingles carry a thicker profile and longer warranty, making them the better long-term investment for most homeowners. Fasteners must be corrosion-resistant with a minimum 3/8-inch head and must penetrate at least 3/4 inch into the deck. Staples are prohibited under the 2024 IRC. That rule exists because staples pull through shingles under wind load, a failure mode that nails do not share.
Materials checklist
- Asphalt shingles (order 10% extra for waste and cuts)
- Roofing nails (1.25-inch to 1.75-inch, galvanized or stainless)
- Synthetic or felt underlayment (15 lb or 30 lb felt, or a synthetic equivalent)
- Ice and water shield for eaves, valleys, and penetrations
- Drip edge (aluminum or galvanized steel)
- Starter strip shingles
- Ridge cap shingles
- Step flashing and valley flashing
- Roofing adhesive or tar sealant
Tools and safety gear
| Tool or Equipment | Purpose |
|---|---|
| Pneumatic nail gun | Speeds up fastening and maintains consistent depth |
| Hammer | Hand-nailing and adjustments |
| Chalk line | Keeps shingle rows straight and exposure consistent |
| Utility knife with hook blade | Cuts shingles cleanly |
| Tape measure | Verifies exposure and overhang dimensions |
| Fall arrest harness | Prevents fatal falls on pitched roofs |
| Non-slip roofing boots | Maintains footing on steep slopes |
| Safety glasses and gloves | Protects against debris and nail ricochet |
| Extension ladder (rated for your weight) | Safe roof access |
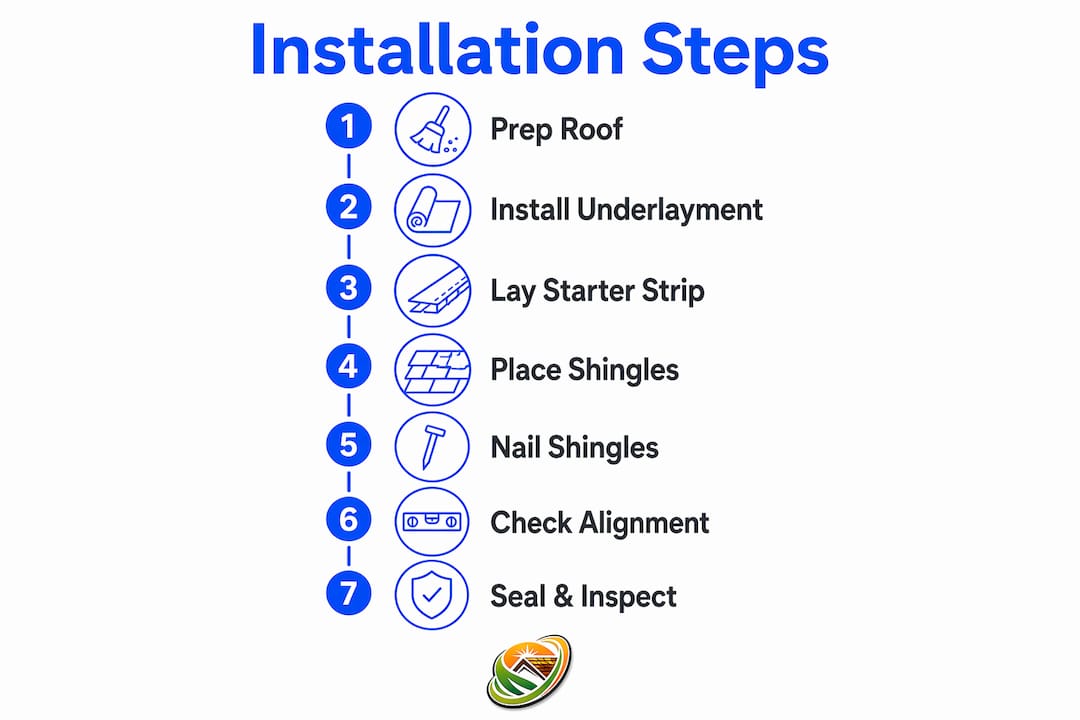
Pro Tip: Set your nail gun depth before you start. A nail driven too deep tears through the shingle mat. A nail driven too shallow catches on the next course and lifts it.
How do you prepare the roof deck and install underlayment correctly?
Roof deck preparation is the foundation of every shingle installation. New shingles are only as durable as the substrate and flashing beneath them. Skipping this phase is the most common reason a brand-new roof leaks within its first year.
Follow these steps in order:
- Remove all old roofing material. Strip shingles, underlayment, and any remaining staples or nails down to bare decking. A clean surface lets you see every problem.
- Inspect every deck board. Walk the deck carefully and probe soft spots with a screwdriver. Replace any OSB or plywood panel that shows rot, delamination, or significant damage. A spongy deck will not hold nails securely.
- Verify the roof slope. Minimum slope for asphalt shingles is 2:12. Slopes between 2:12 and 4:12 require double-layer underlayment. Slopes below 2:12 prohibit asphalt shingles entirely under current building codes.
- Install the drip edge along the eaves first. Nail it every 12 inches. The drip edge goes under the underlayment at the eaves and over it at the rakes.
- Apply ice and water shield at the eaves. In Florida, this step protects against wind-driven rain. Run it up the slope at least 24 inches past the interior wall line.
- Roll out underlayment from eave to ridge. Overlap each course by at least 2 inches horizontally and 6 inches at end laps. Staple or cap-nail it flat with no bubbles or wrinkles.
- Install the rake drip edge over the underlayment. This sequence ensures water that gets under the shingles sheds outward, not inward.
- Snap a chalk line for your starter strip. The starter strip should overhang the drip edge by 1/2 to 3/4 inch. Nail it 3 inches from the eave edge.
Pro Tip: In South Florida, use a self-adhering ice and water shield across the entire deck if your roof pitch is low. Wind-driven rain during hurricane season finds every gap that standard underlayment leaves behind.
How do you lay asphalt shingles step by step?
Laying shingles correctly means starting at the right place, nailing in the right spots, and staggering joints so water never finds a straight path down. Incorrect nail placement is the leading cause of warranty voiding and early roof failure. Precision here is not optional.
- Start at the bottom center of the eave. Work outward toward both rakes, then upward. This keeps your layout symmetrical and your exposure consistent.
- Set your exposure. Standard three-tab shingles expose 5 inches per course. Architectural shingles vary by product. Check the manufacturer spec sheet before snapping your first chalk line.
- Nail each shingle in the designated nail line. Never nail in the exposure zone or through the adhesive strip. The nail line is printed on the shingle face for a reason.
- Use 4 nails per shingle in standard conditions. In high-wind zones above 110 mph, use 6 nails per shingle. Broward and Palm Beach counties fall under Florida's high-velocity hurricane zone requirements, so confirm your local code before nailing.
- Stagger joints by at least 6 inches between courses. Never align vertical joints in adjacent rows. Aligned joints create a direct water path through the roof.
- Seal shingles by hand in cold weather. The adhesive strip on each shingle bonds with heat. Below 40°F, apply a dab of roofing cement under each tab to activate the seal manually. Pressing rows firmly on warm days aids proper bonding without additional sealant.
- Cut shingles for valleys and hips with a hook blade. Score the back and snap cleanly. For open valleys, leave a 6-inch gap centered on the valley flashing. For closed-cut valleys, overlap the full shingle and trim with a straight cut 2 inches off center.
- Install ridge caps last. Use manufacturer-supplied ridge cap shingles or cut standard shingles into thirds. Nail 1 inch from each side edge and overlap each cap by 5 inches.
Pro Tip: Snap a chalk line every 5 courses to check your exposure. Shingles drift over a long run. Catching a 1/4-inch error at course 10 is easy. Catching it at course 30 means tearing off half the roof.
Nailing requirements by wind zone
| Condition | Nails per shingle | Nail placement |
|---|---|---|
| Standard (under 110 mph) | 4 | On manufacturer nail line |
| High wind (over 110 mph) | 6 | On manufacturer nail line |
| All conditions | Corrosion-resistant, 3/8-inch head | Minimum 3/4-inch deck penetration |
What mistakes should you avoid during shingle installation?
Most roof failures trace back to a short list of repeatable errors. Deviating from manufacturer instructions voids warranties and causes premature roof failures. Knowing these mistakes in advance is cheaper than fixing them after the fact.
- Skipping deck inspection. Nailing into rotted decking gives fasteners nothing to grip. The shingles will lift in the first strong wind.
- Using staples instead of nails. The 2024 IRC prohibits staples for asphalt shingles. Staples fail under wind uplift and void most manufacturer warranties immediately.
- Misplacing nails. Nails driven too high (above the nail line) leave the lower shingle tab unfastened. Nails driven through the adhesive strip prevent proper sealing.
- Ignoring attic ventilation. Poor attic ventilation causes heat to build under the deck, accelerating granule loss, curling, and cracking. The standard recommendation is 1 square foot of ventilation per 150 square feet of attic space, balanced between soffit intake and ridge exhaust.
- Improper flashing at penetrations. Chimneys, vents, and skylights need step flashing integrated with each shingle course, not just caulk over the gap. Caulk cracks. Properly lapped metal flashing does not.
- Installing in wet or freezing conditions. Wet decking traps moisture under the underlayment. Cold temperatures prevent adhesive strips from bonding. Both conditions guarantee future problems.
- Inconsistent overlap. Varying your exposure by even 1/4 inch per course adds up to a visible wave across the roof and uneven water shedding.
Proper attic ventilation is not a finishing detail. It is a structural requirement that directly determines how long your shingles last. A roof installed perfectly on the outside but ventilated poorly on the inside will fail years ahead of schedule.
Pro Tip: Walk the finished roof before cleanup. Press every shingle edge. Any tab that lifts needs a dab of roofing cement underneath. Wind uplift starts at the edges, not the field.
How do you maintain your asphalt shingle roof after installation?
Installation is the beginning, not the end. Roof lifespan differences of 20 versus 30 years often hinge on proactive maintenance and ventilation rather than installation quality alone. A solid shingle roof care routine costs far less than a premature replacement.
Your shingle roof upkeep schedule should include:
- Biannual inspections in spring and fall, plus a check after any severe storm. Look for missing shingles, lifted tabs, and exposed nail heads.
- Granule checks in your gutters. Heavy granule loss signals that shingles are nearing the end of their protective life. Catching it early gives you options.
- Gutter cleaning twice a year. Clogged gutters back water up under the starter strip and rot the fascia board. Clean gutters are a direct investment in roof longevity.
- Attic ventilation confirmation. Check that soffit vents are not blocked by insulation and that ridge vents are clear of debris. Restricted airflow shortens shingle life measurably.
- Zinc or copper strip installation at the ridge. Rainwater carries trace amounts of zinc or copper down the roof, inhibiting algae and moss growth. This is one of the most cost-effective shingle preservation tips available.
- Professional assessment when repair costs approach 25–50% of replacement cost. At that threshold, full replacement is generally recommended for cost effectiveness. Patching an aging roof repeatedly costs more in the long run.
For a complete shingle roof longevity checklist, Shingleroofrenewal has published a detailed resource covering every maintenance checkpoint by season.
Pro Tip: Take dated photos of your roof every six months from the same angles. A side-by-side comparison over two years shows granule loss and shingle movement that a single inspection misses.
Key Takeaways
Proper shingle installation requires code-compliant fasteners, correct underlayment sequencing, precise nail placement, and a consistent maintenance routine to reach full roof lifespan.
| Point | Details |
|---|---|
| Nail count and type are non-negotiable | Use 4 nails per shingle standard, 6 in high-wind zones, always corrosion-resistant with a 3/8-inch head. |
| Deck prep determines roof durability | Replace rotted decking and integrate flashing before laying a single shingle. |
| Slope governs underlayment requirements | Slopes between 2:12 and 4:12 require double-layer underlayment per current building codes. |
| Attic ventilation extends shingle life | Balance soffit intake and ridge exhaust at 1 sq ft per 150 sq ft of attic space. |
| Maintenance doubles your roof's useful life | Biannual inspections, gutter cleaning, and granule monitoring prevent premature failure. |
What I have learned after watching too many roofs fail too soon
I have seen homeowners do everything right on installation day and still end up with a leaking roof within three years. The pattern is almost always the same: they nailed correctly, they overlapped properly, and then they never went back up there. No inspection, no gutter cleaning, no ventilation check. The roof was installed well and then abandoned.
The other pattern I see constantly is the opposite problem. Homeowners skip the deck inspection because they want to save a Saturday. They nail new shingles over a soft spot, the deck compresses under foot traffic, and the fasteners lose their grip before the first hurricane season. New shingles on a bad deck are not a roof. They are a temporary cover.
The detail that surprises most people is how much attic ventilation matters. You can follow every shingle installation step perfectly and still watch your shingles curl and crack in five years if the attic runs hot. Heat is the silent killer of asphalt shingles, and it works from the inside out.
My honest advice: treat installation day as the start of a maintenance relationship with your roof, not the finish line. Schedule your first inspection six months after installation. Check the attic in july when temperatures peak. Clean the gutters before hurricane season. Those habits are worth more than any premium shingle product.
— Daniellison
Your roof after installation: what Shingleroofrenewal can do

A well-installed roof still needs ongoing care, especially in South Florida where heat, UV exposure, and storm season work against asphalt shingles year-round. Shingleroofrenewal specializes in exactly what comes after installation: preservation, early problem detection, and renewal before replacement becomes the only option. As a certified applicator of Fresh Roof's Green Soy Technology, Shingleroofrenewal restores shingle flexibility at the molecular level, locks in granules, and extends qualifying roof lifespans significantly. If your newly installed or aging roof shows early signs of wear, a free roof inspection from Shingleroofrenewal can tell you whether preservation is still an option before a full replacement becomes necessary. Explore the full range of roof renewal services available to Broward and Palm Beach County homeowners.
FAQ
How many nails does each asphalt shingle require?
Standard conditions require 4 nails per shingle. In high-wind zones with design speeds above 110 mph, the 2024 IRC requires 6 nails per shingle, all placed on the manufacturer-designated nail line.
What is the minimum roof slope for asphalt shingles?
The minimum slope is 2:12. Slopes between 2:12 and 4:12 require double-layer underlayment, and slopes below 2:12 prohibit asphalt shingles under current building codes.
Can you install shingles over existing shingles?
Most building codes allow one layer of new shingles over one existing layer, but this approach hides deck damage and adds weight. Stripping to bare decking gives you the chance to inspect and repair the substrate before installation.
How often should you inspect a new asphalt shingle roof?
Industry best practice calls for biannual inspections in spring and fall, plus an additional check after any severe weather event.
What voids an asphalt shingle warranty?
Using staples instead of nails, misplacing fasteners outside the nail line, and deviating from manufacturer installation specifications are the most common causes of warranty voidance. Proper documentation of installation and maintenance records supports any future warranty claim.