
TL;DR:
- Homeowners in South Florida can safely repair minor roof damage like replacing missing shingles or sealing nail heads. They should avoid working on steep or widespread damage and recognize when professional help is necessary. Proper tools, materials, and safety measures are essential for effective DIY roof repairs.
DIY roof repair refers to homeowners performing minor, targeted fixes to asphalt shingle roofs to extend their lifespan before full replacement becomes necessary. In South Florida, where Broward and Palm Beach County homes face relentless sun, salt air, and storm cycles, even small shingle problems can escalate fast. 60% of amateur repairs fail within two years in Florida due to improper methods. That number tells you exactly what is at stake when you grab a caulk gun without a plan. This guide covers what you can safely fix yourself, what tools you need, how to do it correctly, and when to call a professional before a small problem becomes a $15,000–$30,000 replacement.
Which roof repairs can South Florida homeowners safely do themselves?
Safe do it yourself roofing is limited to isolated, minor damage on accessible sections of single-story homes. Attempting repairs on steep slopes, multi-story roofs, or widespread damage crosses from maintenance into professional territory.
The repairs most homeowners can handle include:
- Replacing 1–3 missing shingles where the surrounding shingles are intact and the decking below is firm
- Sealing exposed nail heads that have popped above the shingle surface
- Clearing debris from roof valleys to prevent water pooling and accelerated granule loss
- Applying sealant to small, localized cracks on flat, reachable sections
South Florida adds specific complications. Salt air accelerates asphalt bond decay 20–30% faster here than in other regions. That means a shingle that looks fine from the ground may already have a compromised adhesive bond underneath. Wind codes in Broward and Palm Beach counties also require shingles rated for high-velocity hurricane zones, so any replacement shingle must match that rating exactly.
Homeowners frequently mistake maintenance for repair. Safe DIY projects stay within dry, intact shingle areas on accessible roofs. If you are unsure whether your roof qualifies, a roof damage assessment is the right first step before touching anything.
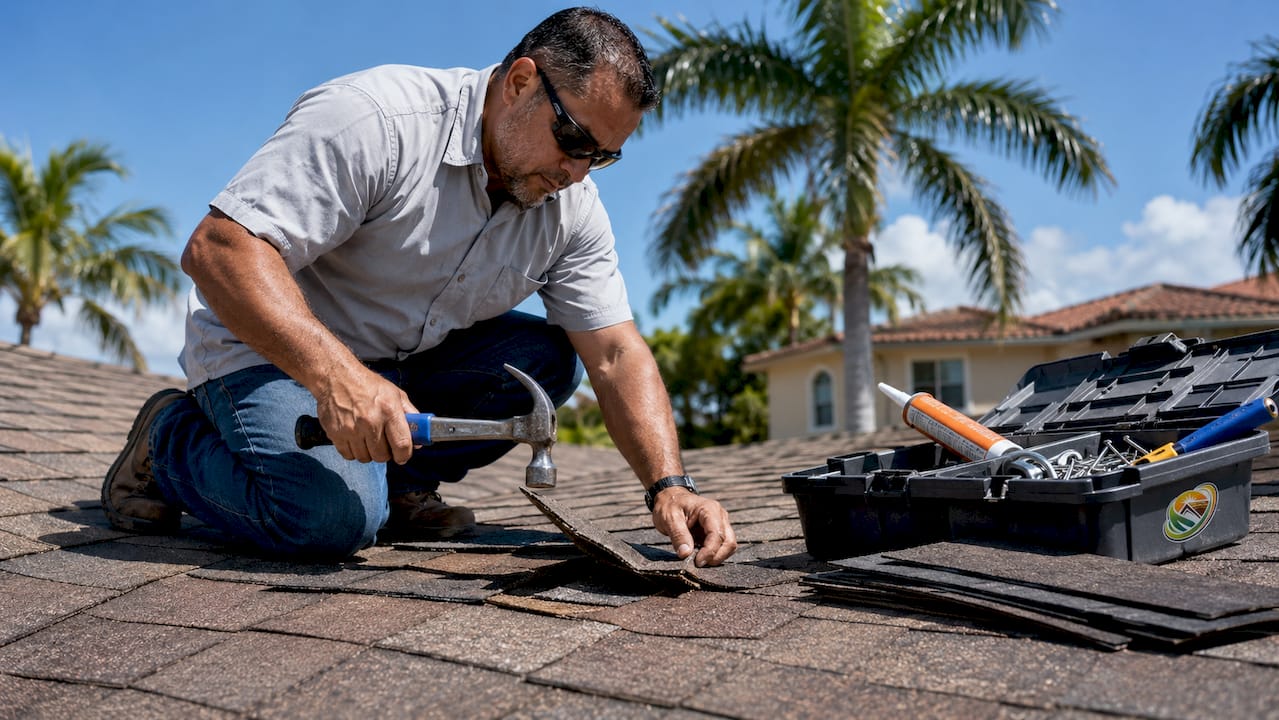
Pro Tip: Before buying replacement shingles, photograph the existing ones and bring the photo to your supplier. Shingle color and texture vary by manufacturing batch, and a visible mismatch signals an amateur repair to any future home inspector.
What tools and materials do you need for asphalt shingle repair?
Proper preparation separates a repair that lasts from one that fails in the next rainstorm. Gather everything before you climb.
Required tools
- Pry bar for lifting adjacent shingle tabs without cracking them
- Roofing hammer or nail gun for fastening new shingles
- Roofing nails (galvanized, 1.75-inch minimum for South Florida wind codes)
- Putty knife for applying and spreading roofing cement
- Caulking gun for precision sealant application
- Utility knife for trimming shingles to fit
Materials
- Matching asphalt shingles rated for high-velocity hurricane zones
- Professional-grade roofing cement designed for Florida's thermal cycles
- Roofing underlayment tape for sealing any exposed substrate
Safety gear
- Safety harness anchored to a ridge strap or structural anchor point
- Non-slip rubber-soled boots
- Protective gloves to handle shingles and nails safely
- Safety glasses for debris protection
Hardware store sealants often provide only a 90-day temporary fix and trap moisture under shingles, accelerating wood deck rot. That is a critical distinction in South Florida, where daily thermal expansion and contraction demand a sealant built for the climate.
Pro Tip: Set your ladder on firm, level ground and extend it at least three feet above the roofline. In South Florida's summer heat, plan your work before 9:00 AM or after 4:00 PM. Shingles soften above 95°F, making them easier to damage and harder to seal correctly.
| Tool category | Purpose |
|---|---|
| Pry bar | Lifts adjacent tabs without cracking bonded shingles |
| Roofing nails (galvanized) | Provides corrosion-resistant fastening in salt-air conditions |
| Professional-grade sealant | Handles thermal expansion and prevents moisture intrusion |
| Safety harness | Prevents fall injuries during elevated work |
| Putty knife | Applies roofing cement evenly under shingle tabs |
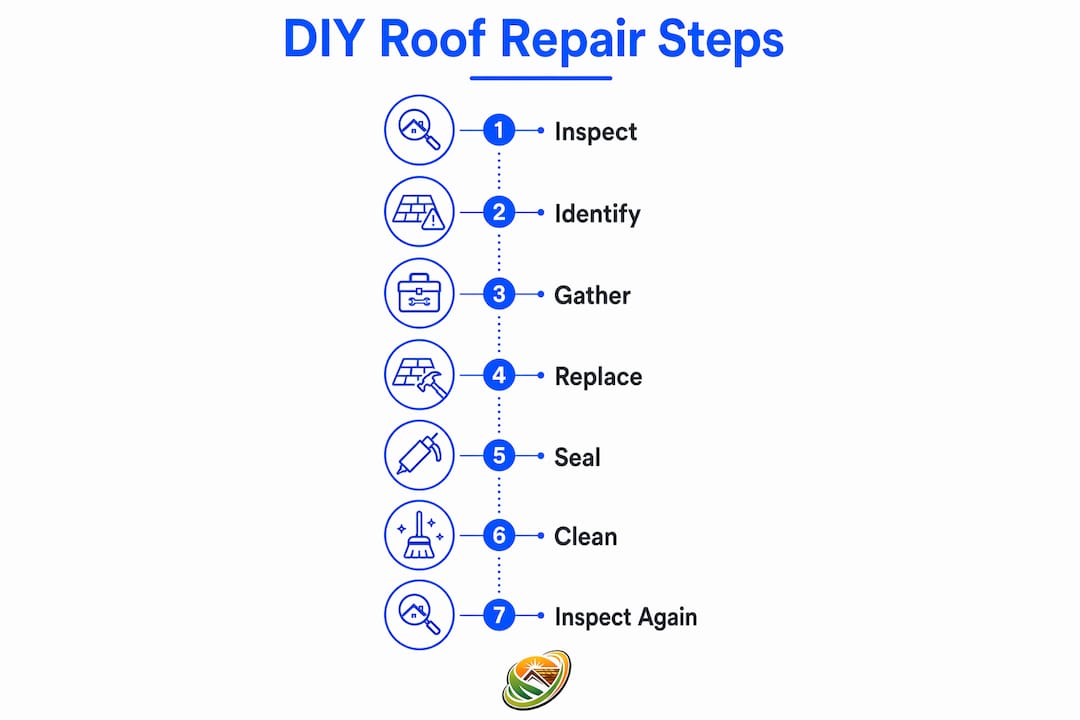
How do you replace a missing or damaged asphalt shingle?
Replacing a shingle correctly requires patience and attention to sequence. Rushing any step creates a new leak point.
-
Inspect the work area from the ground first. Use binoculars to confirm the damage is limited to 1–3 shingles and that the surrounding shingles are flat and intact. If you see widespread curling or soft spots, stop and call a professional.
-
Access the roof safely. Position your ladder on firm ground, clip on your harness, and move to the damaged area without stepping on the shingles directly above the repair zone.
-
Loosen the bonded tabs above the damaged shingle. Slide the pry bar gently under the tabs of the shingle row directly above. In South Florida heat, adhesive bonds are strong. Work slowly to avoid cracking adjacent tabs.
-
Remove the damaged shingle. Pull out the roofing nails holding it in place using the pry bar. Slide the old shingle out carefully. Inspect the decking beneath for soft spots or rot. If the decking feels spongy, the repair exceeds DIY scope.
-
Clean the substrate. Remove any old roofing cement or debris from the exposed area using your putty knife. A clean surface is the foundation of a lasting bond.
-
Slide the new shingle into position. Align it with the surrounding shingles so the tabs line up evenly. The shingle should sit flat with no gaps at the edges.
-
Fasten with six nails per shingle. The six-nail rule per 2026 Florida Building Code ensures wind resistance in hurricane-zone conditions. Place nails one inch from each side edge and evenly spaced across the nailing strip. Drive nails flush, not countersunk.
-
Apply roofing cement under the tabs above. Lift the tabs of the row above and apply a quarter-sized dab of professional-grade roofing cement under each tab. Press them firmly down. This seals the repair against wind uplift and moisture.
-
Seal all nail heads. Apply a small amount of roofing cement over each exposed nail head on the new shingle. This prevents rust and water intrusion around the fastener.
-
Document the repair with photos. Date-stamped photos protect you if an insurance claim arises later. Store them with your home maintenance records.
Pro Tip: Stagger your shingle joints so no two vertical seams align in adjacent rows. Aligned seams create a direct water path to the decking. Staggering by at least six inches is standard practice and required under Florida code.
When does a roof problem require professional assessment?
Some conditions make DIY repair the wrong choice, regardless of your skill level. Recognizing those conditions early saves money and protects your warranty.
Call a professional when you observe any of the following:
- Widespread curling or cupping across multiple shingle rows, which signals systemic shingle failure rather than isolated damage
- Soft or spongy decking beneath shingles, indicating rot that requires structural repair
- Multiple active leaks appearing in different areas of the home
- Brittle shingles that crack underfoot, which means the asphalt has lost its flexibility throughout
- Granule loss covering large sections of the roof surface, leaving the mat exposed to UV
34% of residential construction fatalities are fall-related. That statistic applies directly to homeowners on ladders and rooftops. Steep pitches, wet surfaces, and South Florida's afternoon heat all multiply that risk.
Manufacturer and workmanship warranties are often voided by amateur repairs, potentially exposing homeowners to $15,000–$30,000 in replacement costs if those repairs fail. Insurance coverage can also be affected. A professional inspection in South Florida costs $150–$400 and is recommended twice annually. That cost is a fraction of what a voided warranty could mean.
"Visual ground checks are insufficient. Modern professional inspections use specialized techniques to detect invisible roof wear, such as UV-damaged binders that signal imminent failure. Invisible wear often precedes leaks by months."
Spotting roof damage early is a skill worth developing. But knowing when the damage exceeds your tools is equally important.
What are the most common DIY roof repair mistakes?
Most roofing diy failures trace back to a short list of avoidable errors. Knowing them in advance keeps your repair from creating a bigger problem.
-
Using hardware store sealants. Generic caulks cannot handle South Florida's daily thermal cycles. They crack, shrink, and trap moisture under shingles, which accelerates wood deck rot far faster than the original damage would have.
-
Walking on hot or brittle shingles. Asphalt softens above 95°F, and old shingles become brittle regardless of temperature. Missteps crack tabs and break adhesive seals, turning a one-shingle repair into a five-shingle problem.
-
Incorrect nail placement. Nails driven too high on the shingle (above the nailing strip) or at an angle allow shingles to lift in wind. Nails driven too deep crush the shingle mat and create a water entry point.
-
Skipping underlayment inspection. Attic heat buildup can reach 160°F in South Florida, which accelerates shingle failure from the inside out. If the underlayment beneath a damaged shingle is torn or degraded, replacing just the shingle leaves the root problem unaddressed.
-
Failing to document repairs. Undocumented repairs create gaps in your maintenance record. Insurers and future buyers both rely on that record. Photograph every repair before and after.
Pro Tip: Schedule roof repairs for the dry season, between november and april, when South Florida sees less daily rainfall. Wet shingles and wet roofing cement do not bond correctly. Check the three-day forecast before you start.
Key Takeaways
Safe, well-executed DIY roof repair on isolated shingle damage can extend your roof's life and protect your home, but only when you use the right materials, follow Florida Building Code standards, and recognize the clear limits of what belongs in a homeowner's hands.
| Point | Details |
|---|---|
| Limit scope to minor repairs | Replace only 1–3 shingles on accessible, single-story sections with intact surrounding shingles. |
| Use climate-rated materials | Choose professional-grade sealants and hurricane-zone-rated shingles to handle South Florida's thermal cycles and salt air. |
| Follow the six-nail rule | Fasten each shingle with six galvanized nails per 2026 Florida Building Code for wind resistance. |
| Avoid hot-weather work | Shingles soften above 95°F; work early morning or late afternoon to prevent cracking and poor adhesion. |
| Know when to stop | Widespread curling, soft decking, or multiple leaks require professional assessment, not a DIY fix. |
What I've learned watching South Florida homeowners tackle their own roofs
By Daniellison
After years of watching homeowners in Broward and Palm Beach counties attempt roof repairs, the pattern is consistent. The ones who succeed keep their scope narrow. They replace one shingle, seal one nail pop, and stop. The ones who run into trouble are the ones who convince themselves that fixing three shingles is basically the same as fixing ten.
The South Florida climate is genuinely unforgiving in a way that homeowners from other states do not expect. Salt air, daily heat spikes, and hurricane-season wind loads combine to stress every repair point. A sealant that works fine in Georgia will fail here in a season. That is not a scare tactic. It is physics.
My honest advice: treat DIY roof repair as a holding measure, not a solution. Fix the isolated problem, document it, and then get a professional set of eyes on the full roof. Early intervention roof care is always cheaper than emergency repair. The homeowners who protect their roofs longest are the ones who catch problems in the first year, not the third.
The core message I keep coming back to is simple. Call before you need to replace. A roof that looks tired is not always a roof that needs to go.
— Daniellison
Your roof may qualify for preservation before replacement
South Florida homeowners often face a choice that feels binary: repair it yourself or pay for a full replacement. Shingleroofrenewal offers a third option.
As a certified applicator of Fresh Roof's Green Soy Technology, Shingleroofrenewal inspects your roof, assesses its condition, and determines whether it qualifies for preservation and renewal. The process restores shingle flexibility at the molecular level, locks in granules, and slows the deterioration that South Florida's climate accelerates. Qualifying homeowners can save up to 80% compared to full replacement, backed by a 6-year transferable warranty. Before you spend $15,000–$30,000 on a new roof, find out if yours can be saved. Schedule a free inspection with Shingleroofrenewal and get a clear answer.
FAQ
What minor repairs can I safely do myself on my roof?
Replacing 1–3 missing shingles, sealing exposed nail heads, and clearing debris from roof valleys are the repairs most homeowners can handle safely. All work should be limited to accessible, single-story sections with intact surrounding shingles.
How much does DIY shingle repair cost compared to hiring a professional?
Material costs for replacing a few shingles run approximately $30–$50. Professional repairs for the same scope typically cost $400–$1,500, making DIY a reasonable option for truly isolated damage.
Will DIY roof repairs void my warranty?
Amateur repairs frequently void manufacturer and workmanship warranties. Voided warranties can expose homeowners to the full cost of replacement, which ranges from $15,000 to $30,000 in South Florida.
How often should a South Florida homeowner inspect their roof?
Professional inspections are recommended twice annually in South Florida. They cost $150–$400 and document roof health for insurance and warranty purposes, which visual checks alone cannot accomplish.
When should I stop DIY repairs and call a professional?
Stop and call a professional when you find soft decking, widespread curling, brittle shingles, or multiple active leaks. These conditions signal damage that exceeds the scope of safe do it yourself roofing and require professional assessment.