
The most important roof areas to inspect for damage are your flashing and transitions, valleys, shingles and ridge caps, plumbing vent boots, gutters and downspouts, soffits and fascia, and your attic interior. Check these first — they fail before everything else, and catching problems early is the difference between a $500 repair and a $20,000 replacement.
Here's your immediate triage checklist:
- Flashing (chimney, skylights, roof-to-wall) — rust, separation, or cracked sealant
- Roof valleys — debris buildup, lifted edges, corroded valley metal
- Shingles and ridge caps — missing tabs, curling, cupping, blistering, or nail pops
- Vent boots and penetrations — cracked rubber collars, loose stack flashing
- Gutters and downspouts — granule accumulation, sagging, overflow staining
- Soffits, fascia, and drip edge — rot, peeling paint, missing drip edge
- Attic interior — stains on decking, damp insulation, daylight through the deck
Document everything with dated photos before you touch anything.
Key Takeaways
Catching roof damage early, at the transitions and penetrations, is the single most effective way to avoid a full replacement.
| Point | Details |
|---|---|
| Inspect twice a year | Check in spring and fall, and add an unscheduled check after any major storm. |
| Prioritize transitions first | Flashing, valleys, and vent boots fail before shingle fields — start your inspection there. |
| Attic check before assuming a leak | Ceiling stains often trace to ventilation or plumbing issues, not the roof itself. |
| Three or more replacement signs | When sagging, daylight through the deck, multiple shingle layers, and widespread granule loss appear together, replacement is usually required. |
| Shingleroofrenewal | Free inspection and preservation assessment for qualifying asphalt shingle roofs in Broward and Palm Beach County. |
Table of Contents
- Why regular roof inspections save you money
- What to inspect on the exterior, step by step
- What your attic tells you about your roof
- What to do first after a storm
- Safety rules: when to stop and call a pro
- When to call a professional and what to document for insurance
- Can your roof be preserved instead of replaced?
- Our take: inspect first, replace only when you have to
- Shingleroofrenewal helps you preserve your roof before it's too late
- Sources
Why regular roof inspections save you money
Focused inspections catch problems early, when they're still repairable. A cracked vent boot collar costs almost nothing to fix. Left alone for two rainy seasons, it can rot the decking beneath it and push you into a full replacement.
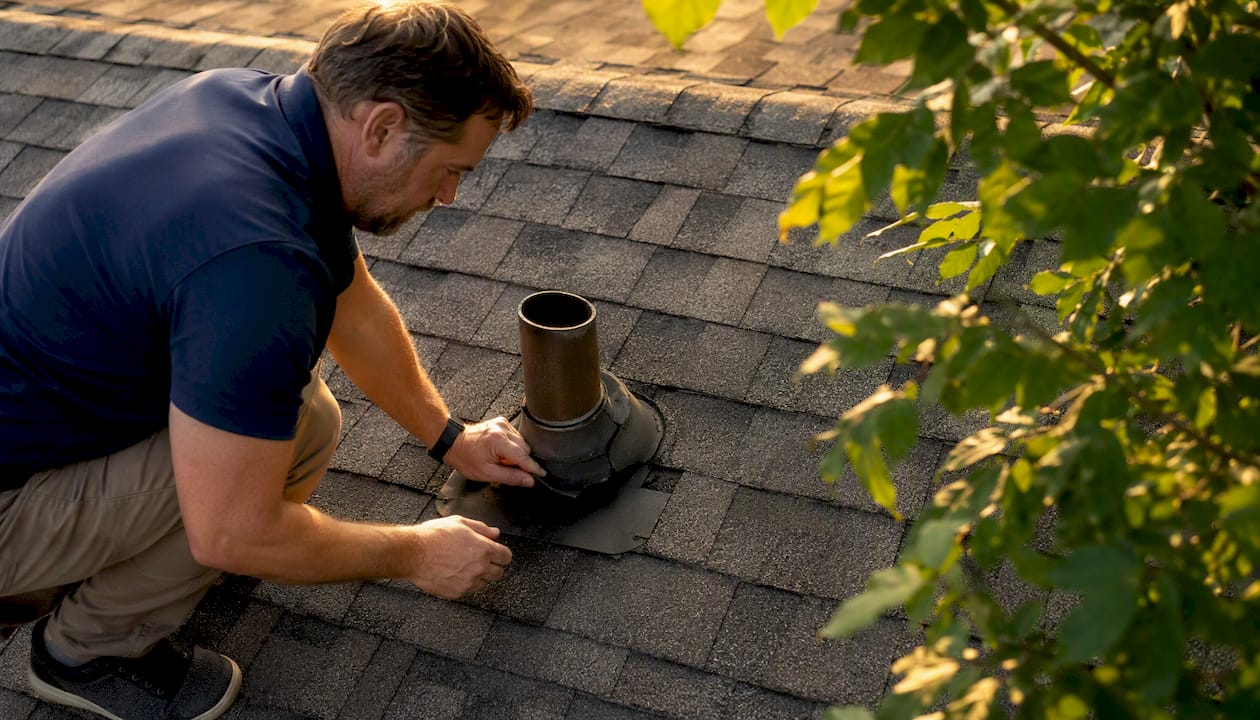
The standard recommendation from roofing professionals is to inspect your roof twice a year, generally once in the spring and once in the fall. After any major storm — wind, hail, or heavy rain — add an unscheduled check. According to GAF's ground inspection guidance, most homeowner-actionable signs are visible from the street or eaves, so you don't need to climb on the roof to get useful information.
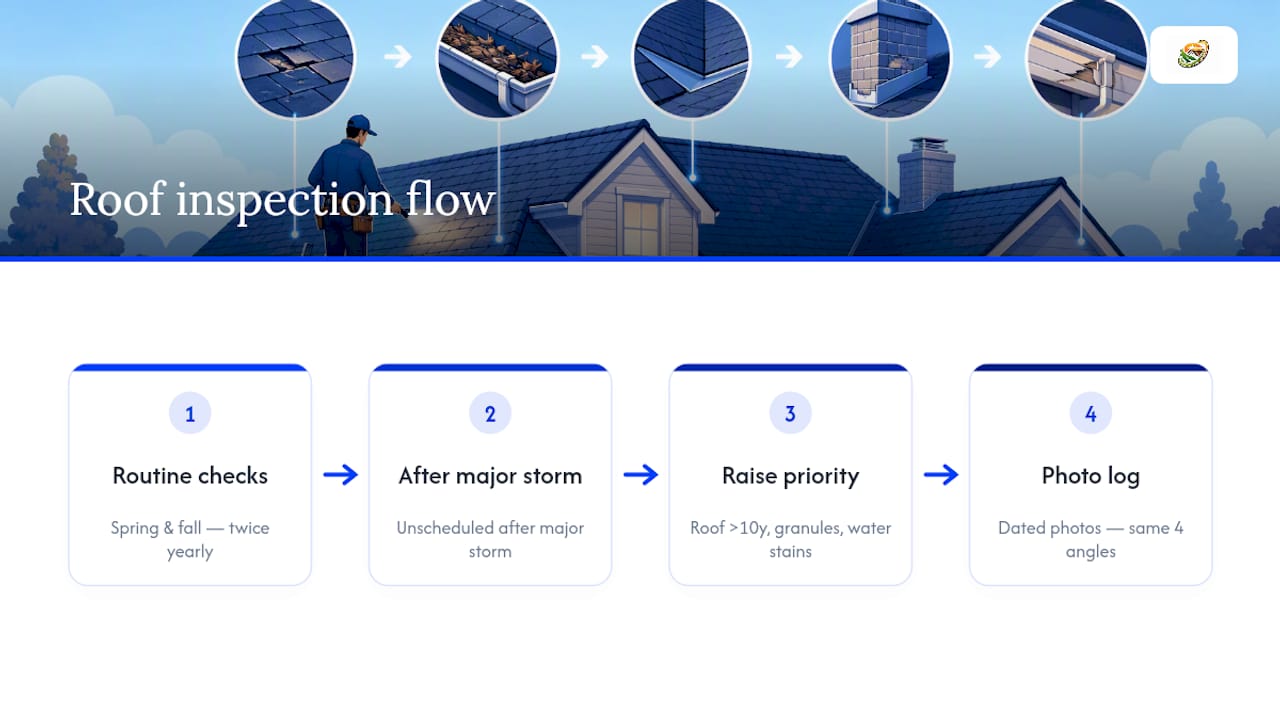
Raise your inspection priority if your roof is over 10 years old, you've had a recent storm, you're seeing granules in the gutters, or you've noticed water stains on interior ceilings. Any one of these signals means you shouldn't wait for the next scheduled check.
Pro Tip: Start a simple photo log. Take dated photos from the same four angles every spring and fall. Over two or three years, you'll see exactly how your shingles are aging — and you'll have documentation ready if you ever need to file an insurance claim or request a preservation assessment.
What to inspect on the exterior, step by step
A safe, thorough exterior inspection works in three stages: from the street, at the eaves from a ladder, and on the roof surface only when conditions are safe. Most homeowners can complete the first two stages without ever stepping on the roof.
From the street (binoculars help)
Stand back far enough to see the full roofline. You're looking for:
- Missing or visibly displaced shingles
- Sagging anywhere along the ridge or field
- Obvious color patches where shingles have shifted or blown off
- Gutters pulling away from the fascia
Ridge caps are a common wind-failure point. Lifted or missing cap shingles are a sign of wind uplift stress and often precede larger field-shingle loss. A ridge line that sags, even slightly, signals a structural concern that needs a professional, not a DIY fix.
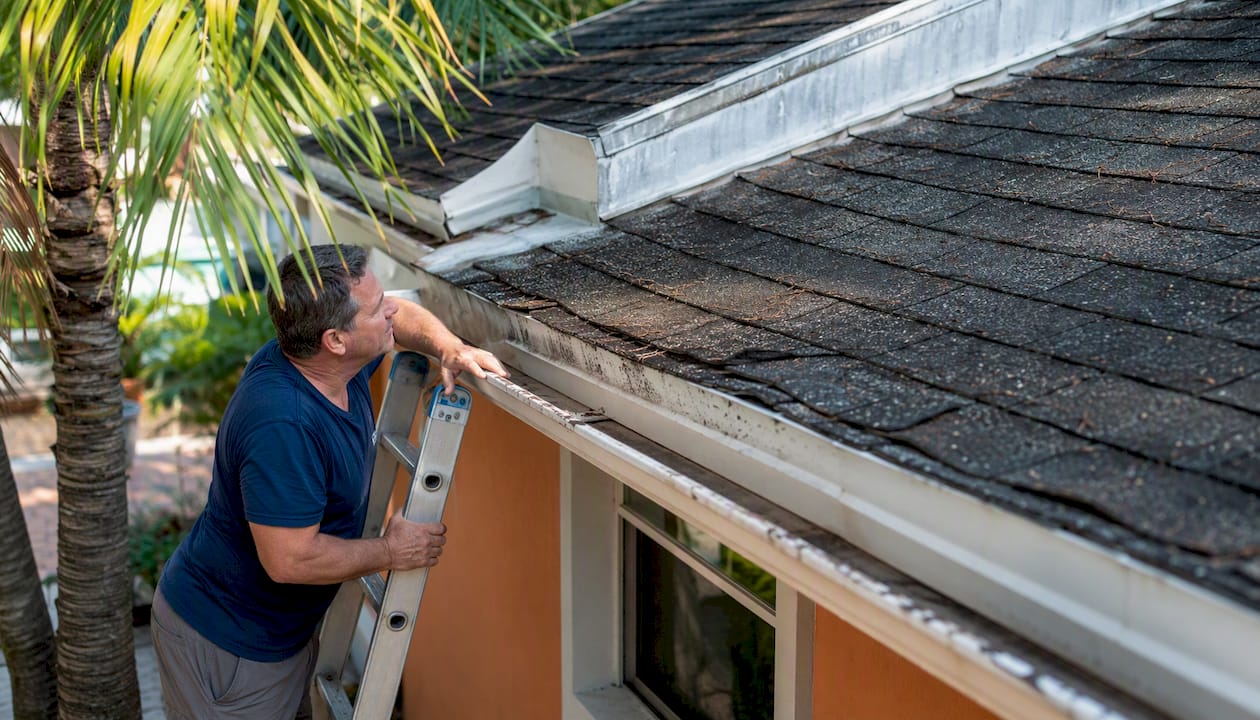
At the eaves and ladder level
This is where you'll find the most detail. Work around the perimeter before going higher. Per the IKO residential inspection checklist, the key items to confirm at this level include:
- Shingle condition: curling, cupping, blistering, exposed nails, and granule loss. Cupping (edges turning up) and curling (tabs bending down) both mean the shingle is losing flexibility and drying out.
- Flashing at transitions: check chimney base flashing, step flashing along walls, and counter-flashing. Look for rust staining, separation from the masonry, and cracked sealant. Flashing and penetration failures often show up long before shingle field failure.
- Valleys: run your eye along each valley. Lifted edges, debris dams, or visible corrosion on valley metal are all red flags. Valleys concentrate water flow, so any gap or lift here becomes a leak fast.
- Gutters: pull a handful of debris from the gutter and look for granules. Granule accumulation in gutters is one of the most reliable early indicators of asphalt shingle aging. Clogged gutters also increase ice dam risk and push water back under the drip edge.
- Soffits and fascia: look for rot, soft spots, peeling paint, and insect damage. A missing or bent drip edge lets water wick behind the fascia and into the decking.
Pro Tip: Test your vent boot collars. Reach up and gently flex the rubber collar around each plumbing vent pipe. A healthy collar flexes without cracking. If it feels brittle or you see surface cracks open up when you flex it, that collar needs replacing — UV and thermal cycling degrade rubber collars faster than almost any other roof component, and they're easy to miss in a visual-only check.
On the roof surface (only when safe)
Walk the roof only if the pitch is 6:12 or lower, the surface is dry, and shingles are not brittle or mossy. For tile and wood shake roofs, stay off the surface entirely — both materials crack under foot traffic. If you do access the surface:
- Start at the eaves and work toward the ridge.
- Check each penetration: vent boots, skylights, and any HVAC curbs for cracked gaskets or separated flashing.
- Press lightly on shingles near the ridge to feel for soft spots in the decking below.
- Photograph every problem area with something for scale (a coin or tape measure works).
- Note the approximate location relative to the ridge and nearest wall for your documentation.
Material-specific notes: On asphalt shingles, look for blistering (trapped moisture or volatile loss) and nail pops. On metal roofing, check fastener heads and seam sealants for rust or separation. On tile, inspect from the eaves and ladder only — never walk tile without professional equipment.
For a one-page version of this checklist you can print and carry, the Shingleroofrenewal homeowner evaluation checklist covers the same inspection points in a compact format.
What your attic tells you about your roof
Many ceiling stains are not roof leaks. Before you call anyone, go into the attic. According to InspectAPedia, attic ventilation problems, plumbing leaks, and HVAC duct issues frequently produce the same interior staining patterns as a roof leak. Diagnosing the source in the attic saves you from unnecessary roof work.
Here's what to look for:
- Stains on the decking: dark streaks or water marks on the underside of the roof deck. Follow them uphill — water travels before it drips, so the stain may be several feet from the actual entry point.
- Damp or compressed insulation: wet insulation loses its R-value and can harbor mold. Press down on batts near the eaves and around any penetrations.
- Daylight through the deck: any visible light coming through the sheathing is a serious finding. It means there's a gap large enough to let water in freely.
- Soft or rotting joists: press on the wood near any stained area. Soft spots mean moisture has been present long enough to begin structural decay.
- Mold or musty smell: mold in the attic often traces to blocked intake vents or a disconnected bathroom exhaust fan duct, not the roof itself.
Check ventilation while you're up there. Blocked soffit vents or a clogged ridge vent trap heat and moisture, which accelerates shingle aging from the inside out and can mimic leak damage on the decking.
Pro Tip: After a storm, go into the attic within 24 hours and check the top plate of the exterior walls and the area directly behind the chimney. Water that enters at a flashing gap often travels down the wall cavity before appearing on a ceiling — checking these spots early reveals the migration path and helps you document it accurately for an insurer or inspector.
What to do first after a storm
After wind, hail, or a heavy rain event, do a perimeter walk and document visible damage before any cleanup begins. Post-storm documentation — date-stamped photos, fallen materials kept as evidence, and a written note of conditions — is what supports an insurance claim. Throwing debris away before photographing it is one of the most common and costly mistakes homeowners make.
Your post-storm priority checklist:
- Walk the perimeter — look for shingles on the ground, dented gutters, and any large branches resting on the roof
- Check for active interior leaks — place buckets and cover furniture; limit secondary water damage immediately
- Photograph from multiple distances — close-up of damage, mid-range showing location on the roof, and a wide exterior shot showing the whole home
- Document metal components — flashing, gutters, and any AC housing often show the clearest hail impact marks and are high-value evidence for adjusters
- Keep fallen shingles or debris — adjusters may want to examine them
- Check vent boots and ridge caps — these are among the first components to fail in high winds
For temporary protection: if you have an active leak and cannot get a contractor on-site immediately, a tarp anchored over the ridge (not just laid flat) will shed water. For interior leaks, a plastic sheet over the ceiling with a drain point into a bucket limits damage while you wait. Do not attempt to tarp a steep or wet roof yourself.
Safety rules: when to stop and call a pro
If the roof is steep, wet, icy, moss-covered, or made of tile or wood shake, do not walk on it. That's the short version. Here's the full guidance:
Do not access the roof if:
- Pitch exceeds 6:12 (roughly 27 degrees)
- Shingles are wet, icy, or covered in algae or moss
- You've had recent hail (shingles may be brittle and will crack underfoot)
- There's any visible structural sag
- You're working alone with no spotter
Ladder safety basics:
- Use a ladder rated for your weight plus tools
- Have a spotter hold the base at all times
- Set the ladder at a 4:1 ratio (one foot out for every four feet of height)
- Never stand on the top two rungs
- Wear rubber-soled shoes and avoid loose clothing
InterNACHI's inspection standards confirm that professional inspectors are not required to walk on unsafe roof surfaces — they use attic checks, eaves-level access, and targeted ladder work to complete a thorough report. You can do the same.
Safe alternatives to walking the roof include binoculars from the ground, a smartphone camera on a telescoping pole, or a drone photo. Many roofing professionals now offer drone-based documentation as part of an inspection, which gives you high-resolution imagery without any fall risk.
Pro Tip: Roof age matters for safety too. A shingle roof over 15 years old in a high-UV climate may be brittle enough to crack under foot traffic even if it looks intact from the ground. If your roof is aging, treat it as fragile and inspect from the eaves and attic only. How roof age affects safety explains the specific thresholds worth knowing.
When to call a professional and what to document for insurance
Small problems — a single missing shingle, an isolated flashing gap, a cracked vent boot collar — are reasonable to document and monitor, or to have repaired by a qualified roofer. Structural issues, active leaks, and widespread damage are not DIY territory.
Call a professional when you find:
- Any sagging along the ridge or in the field
- Daylight visible through the attic deck
- Multiple interior leaks or staining in more than one room
- More than 25% of the roof surface showing damage
- Soft or rotting decking confirmed in the attic
- Unsafe roof access conditions
Choosing the right professional: a licensed home inspector or preservation assessor gives you a written condition report and helps you understand your options before committing to a contractor. A full reroof contractor will typically recommend replacement. Getting an independent assessment first gives you a clearer picture. For a practical guide on what to prepare before a professional arrives, the roof inspection preparation guide from Coastal Roofing covers the key steps.
Documentation checklist for insurance:
- Date-stamp every photo (use your phone's camera with location services on)
- Photograph damage from three distances: close, mid-range, and full exterior
- Record a short video walk-around narrating what you see
- Write dated notes describing conditions at the time of inspection
- Keep copies of any prior maintenance records, inspection reports, or warranties
- Retain any fallen shingles, flashing pieces, or debris until the adjuster has seen them
- File your claim promptly — most policies have a reporting window after a storm event
Can your roof be preserved instead of replaced?
Many asphalt shingle roofs showing early-to-mid signs of wear can be preserved. Replacement is only necessary when structural failure is present or when multiple replacement-grade signs appear together. Knowing the difference saves thousands.
Signs that favor preservation:
- Decking is intact and firm (no soft spots, no daylight)
- Damage is isolated to flashing, a few shingles, or a vent boot
- Granule loss is moderate and not widespread across the entire field
- Roof age is within the manufacturer's expected lifespan for the climate
Signs that typically require replacement include a sagging ridgeline, daylight visible through the attic deck, multiple layers of old shingles already in place, and large-scale granule loss across the field. When three or more of these replacement-grade signs appear together, replacement is usually the right call.
A practical rule of thumb is that if a significant portion of your roof's surface area is damaged or degraded beyond repair, patching becomes less cost-effective than a full replacement. Below that threshold, targeted repairs combined with a preservation treatment can extend useful life significantly.
Preservation works by addressing the root cause of asphalt shingle aging — the loss of flexibility and granule adhesion that comes from UV exposure and thermal cycling. A qualified preservation treatment applied before shingles reach the brittle stage can restore flexibility and slow further deterioration. The result is a roof that performs better, lasts longer, and doesn't end up in a landfill prematurely.
Pro Tip: A transferable warranty on a preservation treatment adds real value when you sell. Buyers and their inspectors notice a documented maintenance history, and a warranty that transfers to the new owner is a concrete selling point — not just a comfort for you.
For a deeper look at how shingle aging progresses and when preservation is still viable, what is roof aging walks through the stages clearly.
Our take: inspect first, replace only when you have to
We've seen too many homeowners in Broward and Palm Beach County replace roofs that didn't need replacing. A neighbor calls a roofer after a storm, the roofer recommends replacement, and the homeowner signs a $20,000 contract — without ever getting an independent assessment to find out if the roof could have been preserved.
Our recommendation is simple: photograph, document, and get an assessment before you commit to anything. If your roof has intact decking, isolated damage, and shingles that haven't crossed into brittle failure, preservation is worth exploring. If it genuinely needs replacement, we'll tell you that too. We're not here to sell you a treatment your roof doesn't qualify for.
The inspection comes first. Everything else follows from what we find.
Shingleroofrenewal helps you preserve your roof before it's too late
Spending $15,000–$30,000 on a full replacement when your roof still qualifies for preservation is a preventable loss. Shingleroofrenewal gives South Florida homeowners a clear, honest answer before that decision gets made.

Our process is straightforward: we inspect your roof, assess its condition, and tell you whether it qualifies for renewal using certified Green Soy Technology — a treatment that restores shingle flexibility, locks in granules, and extends roof life, backed by a 6-year transferable warranty.
We serve Broward and Palm Beach County. The free assessment includes photo documentation and a preservation eligibility check — no pressure, no obligation. Schedule your free roof inspection and find out where your roof stands. Call us before you call the roofer.
Sources
These are the primary references used throughout this article — each one is worth bookmarking for your own inspection records:
- Roof Inspection Checklist for Residential Shingle Roofs - Roofing 101 - IKO
- How to conduct a roof inspection from the ground - GAF
- InspectAPedia
- DIY Roof Inspection Checklist: What to Look For 2026 - NearbyHunt
- 10 Signs You Need a New Roof | The Roofing Brief