
A full DIY roofing shingles project is physically demanding, legally regulated, and far more technical than most homeowners expect. That said, it is absolutely possible for a prepared, safety-conscious homeowner to install asphalt shingles on a straightforward roof. The key word is "prepared." Small repairs under about 10 shingles are manageable for a skilled DIYer. A full reroof, however, requires experience, proper tools, code compliance, and a clear-eyed look at the real costs before a single shingle comes off.
Here is what the process looks like from start to finish:
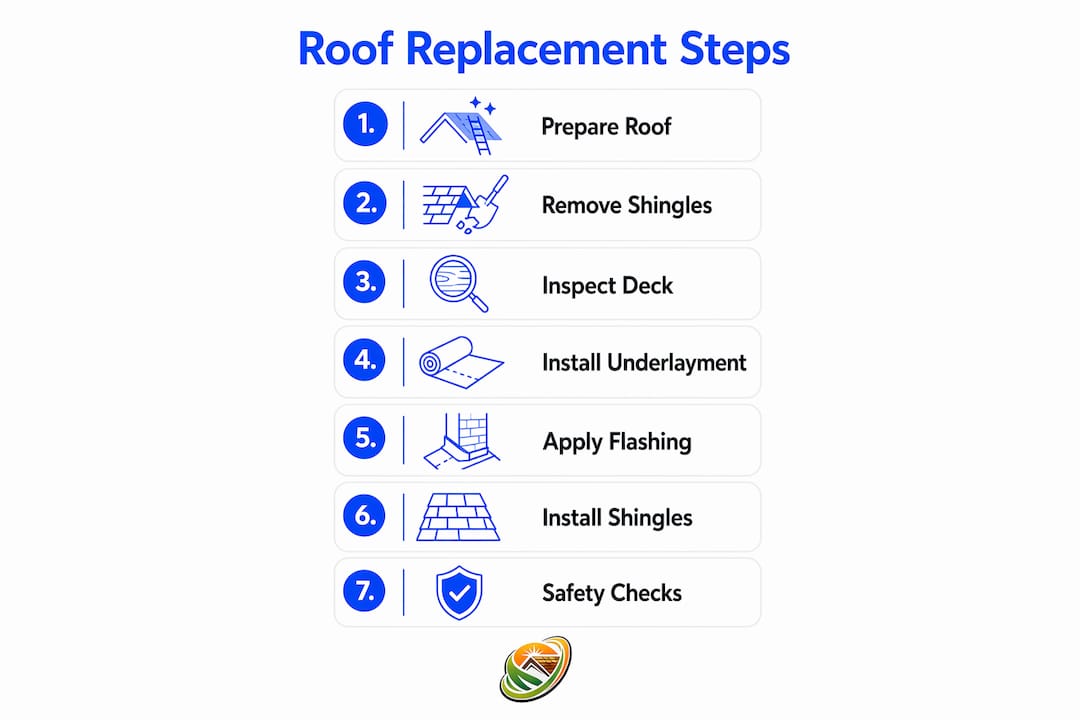
- Inspect and permit: Assess roof condition, pull required permits, and check local code rules.
- Tear off: Remove old shingles, inspect the deck, and repair any damaged sheathing.
- Waterproof: Install drip edge, ice-and-water shield, and underlayment.
- Flash: Seal valleys, chimneys, and wall transitions with new flashing.
- Install shingles: Lay starter strips, field shingles, and ridge caps using correct nailing patterns.
- Final inspection: Schedule your code inspection and document the completed work.
Pro Tip: Before buying a single bundle of shingles, call your local building department. Ask what permits are required, how many inspections you will need, and whether your state allows homeowner-pulled permits. This one call can save you from fines, failed inspections, and insurance headaches down the road.
How to prepare your roof and remove old shingles safely
Good preparation is what separates a roof that lasts 25 years from one that leaks in three. Before any new material goes down, the old roof has to come off cleanly and the deck has to be sound.
Tools and materials you will need
- Roofing shovel or tear-off fork (rents for about $30–$50 per day)
- Pry bar and flat bar
- Hammer and utility knife
- Chalk line and tape measure
- Dumpster rental ($400–$600 typically)
- Safety harness, roof jacks, and non-slip boots
- Tarps to protect landscaping and catch debris
The tear-off process, step by step
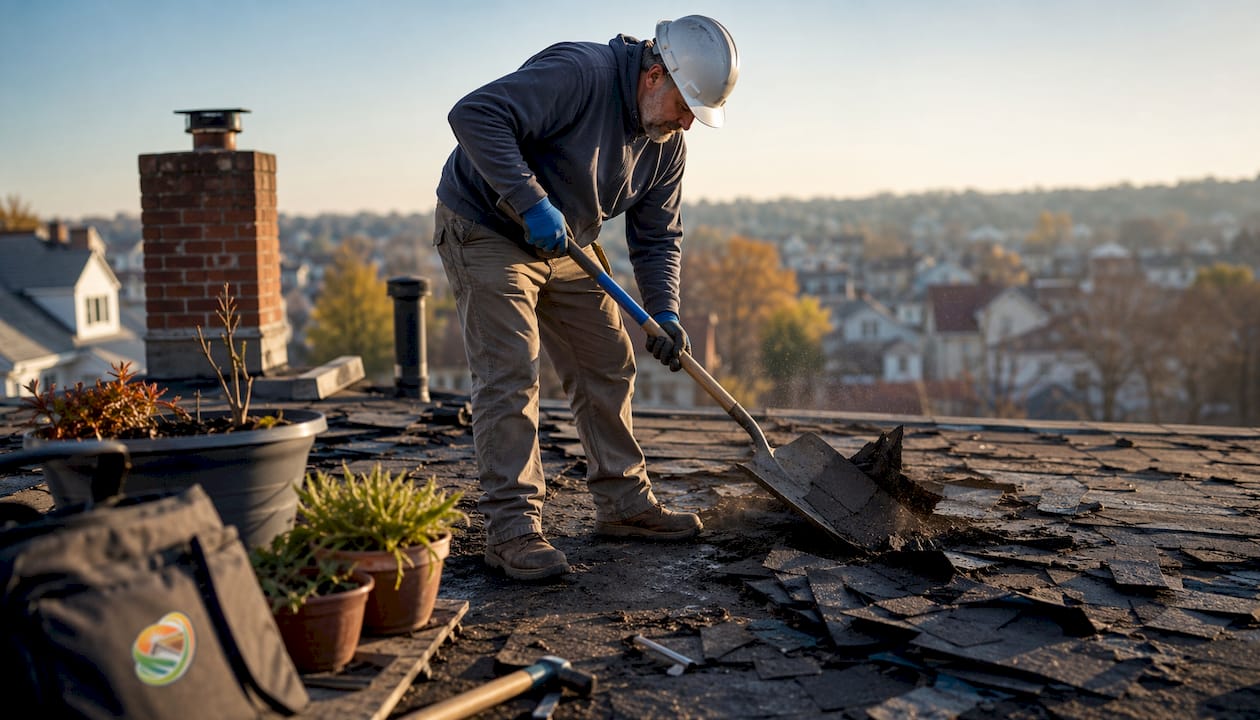
Start at the ridge and work down toward the eaves. A roofing shovel slides under shingles and pops nails loose far faster than a pry bar alone. Work in manageable sections so debris does not pile up and shift your footing. Every old nail must come out or be driven flush. Leftover nail shanks work their way up through new shingles over time, creating punctures you will not find until water is already inside.
Old flashing must come off too. Reusing fatigued metal is one of the most common causes of post-repair leaks. Flashing deforms and corrodes in ways that are invisible from the surface, so plan to replace all of it.
Once the deck is bare, inspect every sheet of plywood or OSB. Soft spots, delamination, and rot must be cut out and replaced before anything else goes on. In hurricane-prone zones like Florida, a "re-nail to code" inspection on the exposed sheathing is mandatory before you can proceed.
Timing matters. Weather conditions directly affect how safely and effectively you can work. Cold weather prevents sealant activation on asphalt shingles, and peak summer heat makes shingles so pliable that walking on them leaves permanent marks. Aim for dry days with temperatures between 45°F and 85°F.
Tear-off checklist:
- Remove all shingle layers down to bare deck
- Pull or flatten every old nail
- Replace all old flashing (do not reuse)
- Inspect and repair rotted or soft sheathing
- Arrange dumpster placement before starting (disposal fees add up fast)
- Protect gutters, landscaping, and AC units with tarps
How to install underlayment and flashing for a watertight base
The underlayment and flashing are your roof's true waterproofing system. Shingles shed most of the rain, but underlayment and flashing stop what gets through. Skipping steps here is where most DIY roofs eventually fail.
Underlayment options for asphalt shingles
| Underlayment Type | Best Use | Key Advantage |
|---|---|---|
| #15 felt (asphalt-saturated) | Budget projects, mild climates | Low cost, widely available |
| #30 felt | Steeper pitches, heavier shingles | More tear-resistant than #15 |
| Synthetic underlayment | Most residential reroofs | Lighter, stronger, UV-resistant |
| Ice-and-water shield | Eaves, valleys, penetrations | Self-sealing, stops wind-driven rain |
Materials you will need for this phase:
- Ice-and-water shield (required at eaves and valleys in most codes)
- Synthetic or felt underlayment rolls
- Drip edge (aluminum or galvanized steel)
- Valley flashing (W-metal or open valley liner)
- Step flashing (L-shaped aluminum pieces)
- Roofing staples or cap nails
- Roofing cement and caulk
Applying underlayment correctly
Install drip edge at the eaves first, before the underlayment. Then roll out ice-and-water shield along the eave line, extending at least 24 inches past the interior wall line. In cold climates, extend it further to cover the full ice-dam zone. Synthetic underlayment goes on next, starting at the eave and working up to the ridge, with each course overlapping the one below by at least 4 inches. Overlap end laps by 6 inches minimum.
Drip edge at the rakes (the sloped sides) goes on after the underlayment, overlapping it. This sequence matters. Reversing it creates a water entry path at the rake edge.
Flashing installation
Step flashing at wall transitions is installed one piece at a time, alternating with each shingle course. Each L-shaped piece overlaps the one below by at least 2 inches. Valley flashing runs the full length of the valley before shingles go on. Around chimneys, use base flashing and counter-flashing set into the mortar joints. A common mistake is using caulk alone at chimneys instead of proper step and counter-flashing. Caulk fails within a few years; metal flashing lasts decades.
Step-by-step guide to nailing, aligning, and layering shingles
This is the core of the job, and it is where most DIY projects go wrong. Shingle installation looks simple from the ground. Up close, it demands consistency across thousands of individual nails and cuts.
-
Install the starter strip. Lay a dedicated starter strip or flip a full shingle upside down along the eave, with the self-sealing strip facing down toward the gutter. The starter strip should overhang the drip edge by 5/8 inch. This first course seals the gaps between field shingles above it.
-
Snap chalk lines. Measure up from the eave in 5-5/8-inch increments (standard exposure for architectural shingles) and snap horizontal chalk lines across the entire roof. These lines keep every course straight. Skipping this step leads to wavy rows that are visible from the street and create drainage problems.
-
Lay the first course. Start at a lower corner, align the shingle with the starter strip, and nail it in place. The nailing zone sits above the sealant strip and below the top edge of the laminate layer. Nailing above this zone only penetrates the headlap of the shingle below, leaving the top shingle unsecured and vulnerable to wind uplift.
-
Use the right nail count. Standard installations require 4 nails per shingle. In high-wind zones as defined by IRC Table R301.2(2), 6 nails per shingle are required. Drive nails flush, not overdriven. An overdriven nail cuts through the shingle; an underdriven nail creates a bump that lifts the course above it.
-
Offset the joints. Joints between shingles in adjacent courses must be offset by at least 1.5 inches. Most installers use a 6-inch rake-edge offset for a clean, staggered pattern that also prevents water from tracking straight down through aligned joints.
-
Work up the roof in courses. Each course laps over the one below, covering the nails of the previous row. Keep checking your chalk lines every few courses. Even a small drift compounds quickly over a large roof.
-
Cut and fit around penetrations. Use a utility knife to cut shingles around pipe boots, vents, and skylights. Seal pipe boots with the manufacturer-supplied rubber collar and roofing cement around the base. Never rely on caulk alone.
-
Install hip and ridge caps. Pre-formed cap shingles or cut-down sections go on last, installed with a 5-inch exposure and nailed 1 inch from each side edge. Ridge caps seal the peak and complete the weather barrier.
Pro Tip: Pneumatic nail guns calibrated for depth are far more consistent than hand nailing across thousands of shingles. If you rent one, test the depth setting on a scrap piece first. A gun set too deep punches through shingles; too shallow leaves nail heads proud of the surface.
For a more detailed walkthrough of each installation stage, the shingle installation guide on the Shingleroofrenewal blog covers nailing patterns and starter course placement in depth.
What safety gear and precautions every DIY roofer needs
Roofing ranks among the highest fatal injury rates in U.S. construction. Falls, heat exhaustion, and tool injuries are the three biggest threats, and all three are preventable with the right preparation.
Safety gear you need before stepping on the roof:
- Full-body harness with roof anchor ($150–$250)
- Roof jacks and planks for working platforms
- Non-slip rubber-soled boots
- Hard hat (for anyone working below)
- Safety glasses and work gloves
- Hydration and sun protection for heat management
Budget several hundred dollars for a complete safety setup. That cost is non-negotiable.
Roof pitch determines your risk level. Slopes above 4:12 require professional-grade fall protection. Above 6:12, you are in high-risk territory that calls for specialized rigging. If your roof is steep and you have never worked at height before, this is the point to call a professional.
Heat exhaustion is a real danger on summer roofing projects. Start early in the morning, take breaks in the shade every hour, and drink water consistently. Dark shingles absorb heat aggressively, and a roof surface in July can reach temperatures well above the ambient air.
Safety best practices:
- Never work alone. Have someone on the ground at all times.
- Set up roof jacks every 4–6 feet on steep sections.
- Keep the work area clear of loose shingles and tools.
- Never work in wet conditions or when rain is forecast.
- Wear a harness even on moderate pitches. Most falls happen on roofs homeowners consider "safe."
- Check your ladder for stability before every climb.
For more on roofing safety practices specific to homeowners, Shingleroofrenewal covers protective measures that apply whether you are doing a repair or a full replacement.
What roofing costs, the 25% rule, and permits actually mean for you
The financial picture of a DIY roof replacement is more complicated than "save on labor." Material costs for a standard residential project run several thousand dollars for a modest-sized home, covering shingles, underlayment, drip edge, valley flashing, ridge vents, starter strips, pipe boots, nails, and sealant. Add dumpster rental, tool rental or purchase, and safety gear, and you are looking at several thousand dollars in hard costs before a single shingle goes down.
Professional installation for the same roof runs several thousand dollars depending on location, complexity, and materials. The savings are real but narrower than most homeowners expect, and one flashing mistake that causes interior water damage can be quite expensive to fix.
The 25% rule: what it triggers and why it matters
The 25% rule in roofing is a building code regulation stating that if more than 25% of a roof's total surface area or roof section is replaced or recovered within a 12-month period, the entire roofing system or section must be brought into compliance with current building codes. The rule is measured strictly by the area of work, not by the cost or area of damage. Partial repairs that surpass the 25% threshold by surface trigger code-driven upgrades including flashings, decking, and ventilation updates. If a 200 sq ft damaged area requires removing 400 sq ft of surrounding shingles to make the repair watertight, the 400 sq ft counts toward the 25% threshold.
Crossing that threshold can turn a modest repair into a significantly more expensive full replacement, since you must upgrade all affected components per current codes. In Florida, this rule is codified under Florida Building Code Section 706.1.1. Understanding which "roof section" your work falls within is critical, since the threshold applies per section, not necessarily the entire roof.
Permits: when you need them and how to get them
Full roof replacements require permits in virtually every U.S. city with a building department, governed by IRC Chapter 9 and Section R907. Minor repairs under certain area thresholds are often exempt. Permit fees typically run a few hundred dollars. Most jurisdictions require 1–3 inspections: a deck inspection after tear-off, and a final inspection after installation.
Cost and legal checklist:
- Get a permit before starting any full replacement or substantial repair.
- Calculate whether your repair scope approaches the 25% surface area threshold.
- Budget for dumpster fees, permit fees, and tool rental from the start.
- Factor in the value of your time. Professional crews finish in 1–3 days; DIY projects often stretch across multiple weekends.
- Check whether your state requires a licensed contractor, even if you pull the permit yourself.
- Understand that an open or failed permit is a red flag at resale.
For a deeper look at building code compliance and how the 25% rule applies in South Florida specifically, Shingleroofrenewal's certification checklist breaks it down by situation.
Permits, inspections, and what DIY work does to your shingle warranty
Full roof replacements require a building permit in most areas. Homeowners can pull their own permit in many states, but some states, including Florida, California, Arizona, Nevada, Louisiana, Oregon, Washington, and Virginia, require a licensed contractor to perform the work. Pulling a homeowner permit makes you personally responsible for code compliance and passing every required inspection.
The inspection sequence for a standard shingle reroof typically includes a deck inspection after tear-off and a final inspection after installation. In high-wind zones like Florida, a nail pattern inspection on the exposed sheathing is also mandatory. Missing an inspection means the permit cannot be closed, and an open permit is a problem you will have to resolve before selling the home.
What DIY installation does to your warranty
Manufacturer warranties on asphalt shingles range from 20–50 years, but most require certified professional installation to remain valid. Install the shingles yourself, and that warranty coverage is typically void. You are left with no recourse if shingles fail prematurely due to a manufacturing defect.
Key permit and warranty facts:
- Always verify your state's licensing requirements before starting.
- Homeowner permits transfer liability for code compliance directly to you.
- Manufacturer warranties usually require certified contractor installation.
- DIY installation voids most workmanship and material warranties.
- A voided warranty means out-of-pocket costs if shingles fail early.
- Document every inspection and keep copies of your permit and final sign-off.
Understanding how warranties work before you start a DIY project can save you from a very expensive surprise years later.
Why professional roof preservation is often the smarter call
Here is something most DIY guides will not tell you: before you commit to a full tear-off, it is worth finding out whether your roof actually needs one. A lot of homeowners in South Florida see cracked, curling, or granule-losing shingles and assume replacement is the only option. Often, it is not.
Shingleroofrenewal specializes in exactly this situation. We are not roofers. We are the company you call before the roofer. Our certified Fresh Roof Green Soy Technology works at the molecular level to restore shingle flexibility, slow deterioration, and lock in granules, extending the life of qualifying asphalt shingle roofs by 10–15 years. For homeowners in Broward and Palm Beach County, where Florida sun, heat, and storms accelerate shingle aging faster than almost anywhere else in the country, that kind of early intervention can mean the difference between a manageable maintenance cost and a $15,000–$30,000 replacement.
Why preservation beats a risky DIY replacement:
- Saves up to 80% compared to full replacement cost
- Backed by a 6-year transferable warranty
- Reduces landfill waste from unnecessary tear-offs
- No permit headaches, no voided manufacturer warranties
- Catches problems early, before they become structural
- Certified applicators, not unlicensed DIY risk
The environmental case is real too. Every unnecessary tear-off sends hundreds of pounds of asphalt shingles to a landfill. Preservation, when the roof qualifies, is the more responsible choice, and it costs far less.
For homeowners who want to understand whether extending shingle life through professional preservation makes more sense than a full DIY replacement, Shingleroofrenewal offers a free roof inspection to assess your roof's condition and tell you honestly what it needs.

Your roof may not need replacing yet. Schedule your free inspection with Shingleroofrenewal today and find out if preservation is an option before you commit to a full DIY project or an expensive replacement.
Key Takeaways
A DIY shingle roof replacement is possible for prepared homeowners, but the real costs, code requirements, and warranty risks make professional preservation worth evaluating first.
| Point | Details |
|---|---|
| Permits are nearly universal | Full roof replacements require a permit in virtually every U.S. city; minor repairs under certain area thresholds are often exempt. |
| The 25% rule can change everything | Replacing more than 25% of a roof's surface area or section within 12 months triggers expensive code compliance upgrades including flashings, decking, and ventilation updates, converting partial repairs into a full replacement scope. |
| Nail placement is critical | Nails placed above the nailing zone only penetrate the headlap below, leaving shingles vulnerable to wind uplift and failure. |
| DIY voids most warranties | Manufacturer warranties ranging 20–50 years are typically void without certified professional installation, leaving you with no coverage if shingles fail early. |
| Preservation can save up to 80% | Qualifying roofs treated with Fresh Roof Green Soy Technology can extend shingle life 10–15 years at a fraction of full replacement cost. |