
The fastest way to avoid common roof damage is to trim overhanging branches, clean gutters twice a year, check flashing around every roof penetration, confirm your attic ventilation meets the 1:150 rule, treat moss with a low-pressure bleach rinse instead of a pressure washer, and walk your property after every major storm to photograph anything that looks off. Do those six things consistently and you'll head off the majority of leaks, granule loss, and premature aging that send homeowners into a replacement quote before their roof actually needed one, which can sometimes be very expensive.
That last part matters more than most homeowners realize. The National Roofing Contractors Association traces a significant portion of premature roof failures back to installation defects and neglected maintenance, not worn-out materials. A shingle rated for 25 years can fail at year 12 simply because nobody checked the flashing or cleared the gutters. The good news is most of the fixes are cheap, fast, and don't require a ladder.
- Trim tree limbs back at least 6 to 10 feet from the roofline.
- Clean gutters and downspouts each spring and fall.
- Scan flashing around chimneys, vents, and skylights for gaps or rust.
- Verify attic ventilation is balanced between intake and exhaust.
- Treat moss or algae with a mild bleach solution, never a pressure washer.
- Walk the perimeter after any hail, high wind, or heavy rain event.
- Photograph and date any new damage before it worsens.
Pro Tip: Most homeowners inspect the roof itself but skip the attic. Climb up with a flashlight after a hard rain and look for daylight, water stains, or damp insulation. Attic clues often show up months before a ceiling stain does.
Key Takeaways
Preventing common roof damage comes down to a consistent seasonal rhythm, correct attic ventilation, and catching small flashing or granule issues before they spread.
| Point | Details |
|---|---|
| Inspect twice yearly | Check your roof each spring and fall, plus immediately after major storms. |
| Fix ventilation first | Balanced attic ventilation meeting the 1:150 standard adds 20% to 30% more shingle life. |
| Treat flashing early | Reseal small gaps and replace cracked pipe boots instead of caulking over failures. |
| Skip the pressure washer | Use a low-pressure bleach rinse for moss and algae to avoid stripping granules. |
| Consider preservation before replacement | Shingleroofrenewal's free assessment determines if aging shingles qualify for restoration instead of a full tear-off. |
Table of Contents
- What Are the Most Common Types of Roof Damage and How Do You Prevent Each One?
- What Maintenance Tasks Actually Prevent Most Roof Failures?
- When Should You Inspect Your Roof Each Year?
- How Does Attic Ventilation Affect Your Roof's Lifespan?
- Where Do Most Roof Leaks Actually Start?
- Do Different Roof Materials Need Different Prevention Steps?
- What Roof Maintenance Mistakes Actually Make Things Worse?
- How Do You Know if It's Time to Repair, Preserve, or Replace?
- What Is Roof Preservation and Who Qualifies for It?
- Which Prevention Steps Give You the Most Protection for the Least Effort?
- What Does Preventive Roof Maintenance Typically Cost?
- How Do You Choose a Qualified Roof Inspector?
- Why Prevention Before Replacement Matters
- How a Free Roof Assessment Can Save You From an Unnecessary Replacement
- Sources
What Are the Most Common Types of Roof Damage and How Do You Prevent Each One?
Every roof failure traces back to one of nine repeat offenders, and each one has a single prevention step that does most of the heavy lifting.
Wind lifts shingles at the edges and tears off tabs that weren't nailed to spec. The single best defense is confirming your roof was installed with the correct nailing pattern; a 6-nail pattern is often required to hold manufacturer wind ratings, and under-nailing voids both the rating and the warranty. Warning sign: shingles that flap in moderate wind or curl at the corners.
Hail bruises the shingle mat and knocks granules loose in a single event. NOAA's hail research notes that a severe hailstorm can shave 10 to 20 years off a roof's remaining life in minutes. The best prevention is a prompt post-storm inspection, since bruised shingles often look fine until a leak develops weeks later.
Water and ice infiltrate through weak seams, especially at valleys and low-slope transitions. Keeping gutters and valleys debris-free is the highest-leverage fix. Warning sign: dark streaking or sagging along the eaves.
Moss and algae trap moisture against the shingle surface and accelerate granule loss. Treat it early with a low-pressure bleach rinse rather than letting it spread.
Flashing failure around chimneys, vents, and skylights causes more leaks than any other single component. Reseal small gaps before they become large ones.
Tree and impact damage from falling limbs or debris punctures the deck outright. Routine trimming prevents most of it.
Animal and pest damage, especially from raccoons, squirrels, or birds nesting near roof edges, loosens shingles and chews through soffit vents. Seal small entry gaps before wildlife makes a home of them.
Foot traffic from unnecessary roof walking, including your own, cracks shingles and dislodges granules. Limit access to service technicians only.
One distinction worth knowing before you file a claim: insurers generally cover sudden, accidental events like wind, hail, and fallen trees, but they routinely exclude damage tied to wear-and-tear or skipped maintenance, like unchecked moss growth. That's one more reason routine upkeep isn't optional if you want your coverage to actually apply when you need it.
What Maintenance Tasks Actually Prevent Most Roof Failures?
Roof maintenance isn't complicated, but it does need to happen on a schedule, not just when something looks wrong. The tasks below cover the systems that fail most often: drainage, flashing, ventilation, and surface wear.
- Clean gutters and downspouts of leaves, granules, and debris.
- Do a ground-level visual scan with binoculars for missing or curled shingles.
- Check the attic for daylight, stains, or musty odors.
- Reseal or replace worn flashing around penetrations.
- Count granule buildup in gutters; heavy buildup signals accelerated aging.
- Treat moss or algae growth with a mild biocide solution.
- Flatten or replace popped nails before they back out completely.
Some of this is genuinely safe for a homeowner to do from a ladder or the ground. Climbing onto the roof itself, resealing major flashing runs, or diagnosing a suspected leak is where a professional earns their fee.
| DIY tasks | Hire-a-pro tasks |
|---|---|
| Clear gutters and downspouts | Replace or reseal chimney and vent flashing |
| Ground-level visual inspection with binoculars | Full roof-surface inspection twice yearly |
| Attic check for stains, daylight, or odor | Repair or replace damaged pipe boots |
| Trim overhanging branches | Diagnose and patch active leaks |
| Photograph visible damage after storms | Assess granule loss and shingle flexibility |
Annual professional maintenance typically runs $250 to $600 and can deliver a 10x to 40x return by extending the roof's usable life well beyond what neglect would allow. Compare that to a full tear-off and replacement, and the math isn't close.
Pro Tip: Keep a simple folder, digital or physical, with dated photos from every inspection. When you eventually need a repair, preservation assessment, or insurance claim, that timeline is worth more than any verbal description of "it's been fine."
When Should You Inspect Your Roof Each Year?
Roofs age on a seasonal clock, and inspecting on that same rhythm catches small problems while they're still cheap to fix. The consensus among roofing professionals is straightforward: check the roof in spring, check it again in fall, and check it immediately after any major storm.
- Spring inspection. Look for winter damage: cracked shingles from freeze-thaw cycles, granule loss in gutters, and any flashing that shifted during cold weather.
- Fall inspection. Clear gutters completely, confirm drainage paths are open, and address anything that could trap moisture or ice through the coming season.
- Post-storm inspection. After any hail, high wind, or heavy rain event, scan for lifted tabs, dents, and debris punctures within a day or two, not weeks later.
This twice-yearly plus storm-triggered rhythm targets six separate failure systems, gutters, flashing, ventilation, fasteners, granule coverage, and moss growth, and can add roughly 5 to 10 years of service life to an asphalt roof that would otherwise age out early.
For a professional's eyes on the whole system, plan a full inspection every two to three years even without visible problems, or sooner if your roof is past the 15-year mark. A one-page evaluation checklist makes it easy to track what you've already covered and what's due next.
How Does Attic Ventilation Affect Your Roof's Lifespan?
Poor attic ventilation is one of the least visible causes of roof damage and one of the most damaging. Heat builds up under the shingles from below, baking them brittle years before their rated lifespan, while trapped moisture rots the decking from the inside out.
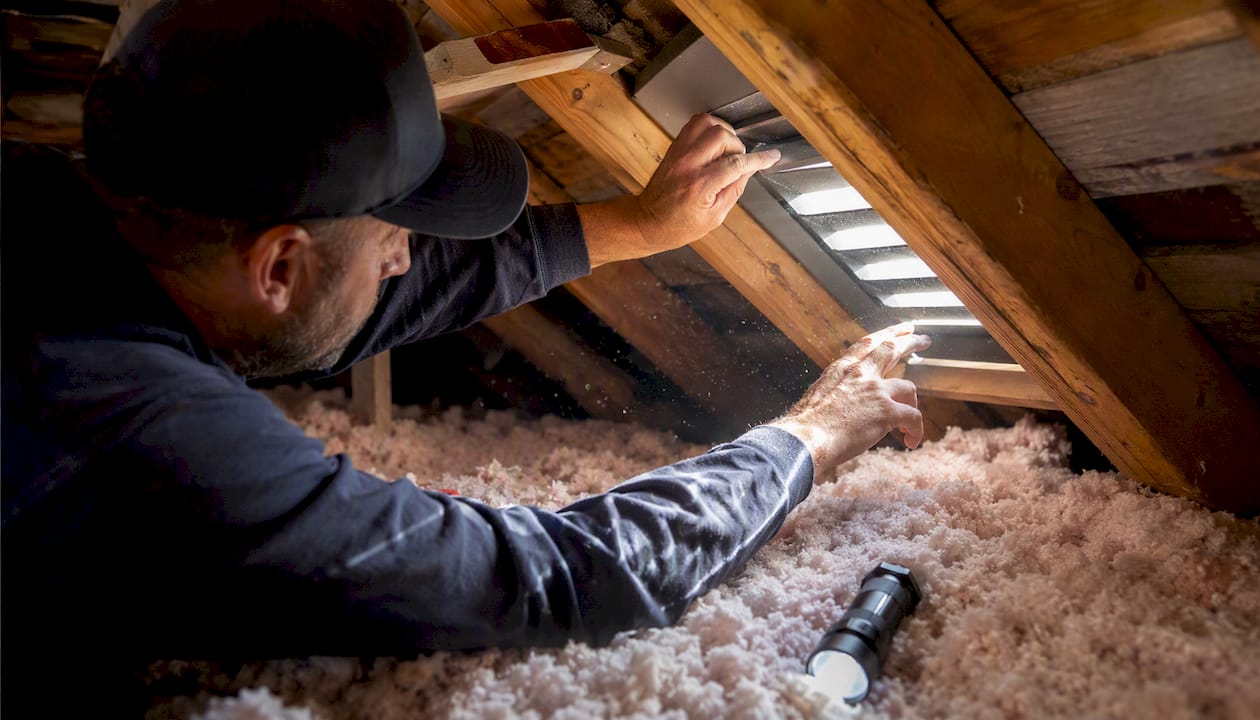
The building standard, laid out in IRC R806, calls for roughly 1 square foot of net free vent area for every 150 square feet of attic floor, split between intake at the soffits and exhaust at the ridge or gables. Roofs that meet this balanced ventilation standard show 20% to 30% longer shingle life than roofs with blocked or mismatched airflow.
You can check your own attic ventilation without any special tools:
- Feel the attic temperature on a hot afternoon; it should feel warm, not sauna-like.
- Look for frost or condensation on the underside of the roof deck in cooler months.
- Confirm soffit vents aren't blocked by insulation, paint, or nesting debris.
- Check that ridge or gable vents are clear of leaves and paint overspray.
Consequences of ignoring this add up quietly: heat-baked shingles lose flexibility and granules faster, ice dams form where warm air melts snow unevenly, and trapped moisture invites rot in the decking itself. Upgrading ventilation is often the single highest-impact fix available, ahead of almost anything else on this list, because it slows aging across the entire roof system at once rather than patching one weak spot.
Where Do Most Roof Leaks Actually Start?
Flashing and pipe boots cause more leaks than shingles ever do. These are the thin metal or rubber components sealing the seams around chimneys, vents, skylights, and valleys, and they're built to a shorter lifespan than the shingles around them.
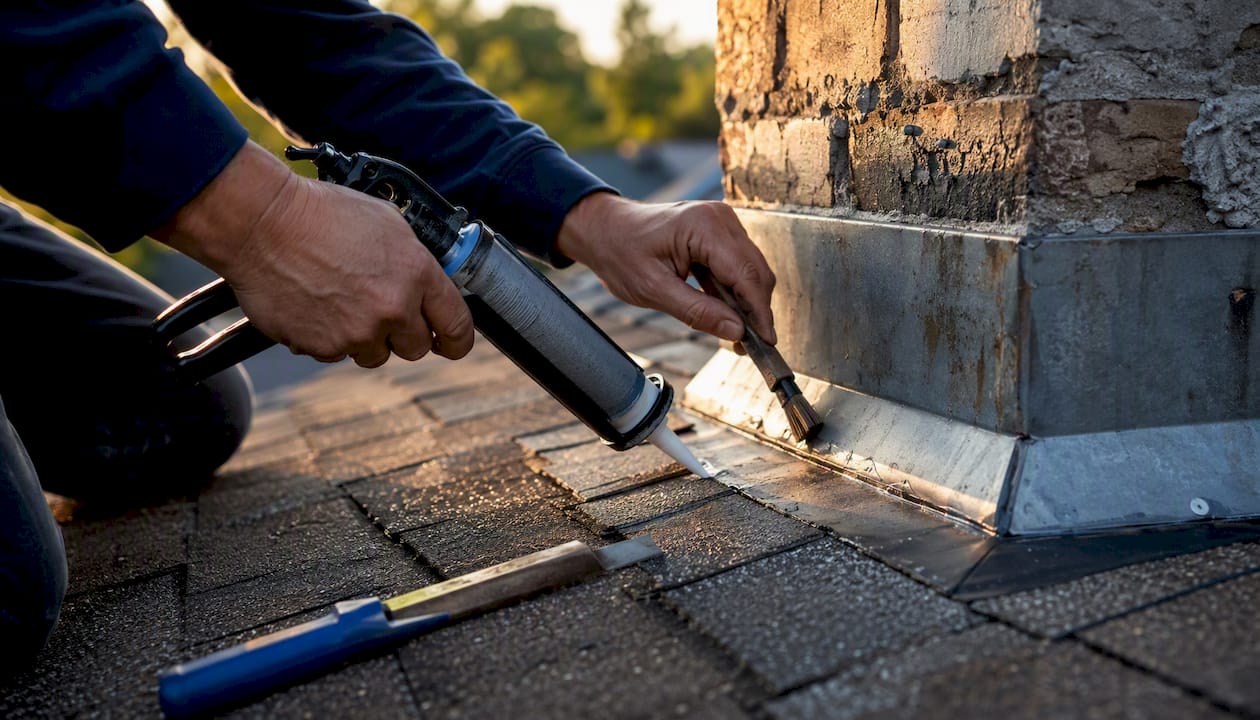
Pipe boot collars, the rubber gaskets around plumbing vents, crack from UV exposure long before the surrounding shingles wear out. Metal flashing rusts, pulls loose from thermal expansion, or gets bent during storms. Both failures look minor from the ground and cause outsized damage from the attic side.
Watch for these specific signs during any inspection:
- Rust streaks or discoloration below flashing joints.
- Visible gaps where flashing meets the roof surface.
- Cracked, brittle, or split rubber pipe boot collars.
- Nail heads exposed where flashing has pulled away.
Prevention here is simple and cheap compared to the leak it prevents. Inspect flashing twice a year alongside your regular maintenance, reseal small gaps with roofing cement as soon as you spot them, and replace cracked pipe boots outright rather than caulking over them. Caulk over a failed boot buys you a few months at best and often hides the problem from the next inspector.
Check these four penetration points every time: the chimney base, all pipe and roof vents, skylight perimeters, and valley intersections where two roof planes meet. If you suspect a flashing leak but can't confirm it from outside, go into the attic during or right after a rainstorm and look for wet spots directly below these penetrations; water almost always travels downhill along the rafters before it shows up on your ceiling.
Pro Tip: A flashlight beam angled low across the attic decking reveals water stains that overhead lighting misses entirely. Shadows make old stains pop.
Do Different Roof Materials Need Different Prevention Steps?
Yes, and treating every roof type the same way is how a lot of preventable damage slips through. Each material ages differently and fails at a different point.
Asphalt shingles show trouble first through granule loss and seal strip failure, the adhesive strip that bonds each shingle to the one below it. Twice-yearly inspection, safe moss treatment, and confirmed attic ventilation cover most of what asphalt roofs need.
Metal roofing fails through fastener back-out, where screws work loose from thermal cycling, and aging sealant at seams. Retorquing exposed fasteners and resealing seams before they gap keeps a metal roof watertight far longer.
Tile roofing cracks or slips out of place from impact or foot traffic, and the underlayment beneath the tiles, not the tiles themselves, is usually what actually fails first. Replace cracked tiles promptly and keep valleys clear of debris that traps moisture against the underlayment.
Flat and low-slope membranes (TPO, EPDM, PVC) fail through ponding water and seam separation. Keeping drains and scuppers clear of debris is the single most effective thing you can do, since standing water is what breaks down seams over time.
| Roof material | Top warning sign | Best preventive action |
|---|---|---|
| Asphalt shingles | Granule loss, curling tabs | Twice-yearly check, moss treatment, confirmed ventilation |
| Metal | Loose fasteners, aging sealant | Retorque fasteners, reseal seams |
| Tile | Cracked or slipped tiles | Replace cracked tiles, clear valleys |
| Flat/membrane | Ponding water, seam separation | Keep drains and scuppers clear |
What Roof Maintenance Mistakes Actually Make Things Worse?
Some well-intentioned homeowner fixes do more damage than the problem they were meant to solve. A few habits show up constantly, and each one has a safer alternative that gets the same result.
Pressure washing shingles. It looks satisfying and strips moss fast, but it also blasts away the protective granules and can void your manufacturer warranty outright. Use a low-pressure bleach and water rinse instead, applied gently with a garden hose sprayer.
Walking on hot or icy shingles. Heat softens asphalt shingles enough that foot traffic dislodges granules and can crack the mat; ice makes the surface a slip hazard on top of that. Schedule roof walks for mild, dry weather, or let a professional handle it.
Caulking over failed flashing. It's the roofing equivalent of a Band-Aid on a broken pipe. Caulk buys a few months of cosmetic cover while water keeps finding its way in underneath. Replace the failed component instead.
Reusing old flashing on a new roof. Contractors sometimes do this to save time, but flashing that's already corroded or bent won't seal properly against new shingles. Insist on new flashing whenever a roof section is redone.
- Don't pressure wash. Do use a low-pressure bleach rinse.
- Don't walk the roof in extreme heat or after ice. Do wait for mild, dry conditions.
- Don't caulk over failed flashing. Do replace it.
- Don't reuse old flashing on new work. Do install new flashing every time.
How Do You Know if It's Time to Repair, Preserve, or Replace?
Not every warning sign means you need a new roof, but some absolutely do. Knowing the difference saves thousands.
- Signs pointing toward replacement: bare mat exposed through worn-away granules, widespread curling or cupping across multiple roof sections, recurring leaks in different spots each time it rains, and flashing failure across a large portion of the roof rather than one isolated point.
- Signs where repair or preservation still works: localized granule loss in one section, a handful of lifted tabs, an isolated flashing gap at a single vent, or shingles that are aging but still flexible rather than brittle.
- What to do next: photograph the affected area, date the photo, and compare it to the same spot next season. If it's spreading, that's your signal to act; if it's stable, targeted repair may be all you need.
- Get a professional opinion before assuming the worst. A preservation assessment can tell you definitively whether a roof showing early wear still qualifies for restoration, rather than defaulting straight to a replacement estimate.
Pro Tip: Insurance adjusters and preservation companies both want the same thing: a dated visual record. Take wide shots and close-ups of any damage the same day you notice it, before weather or repairs change what they can see.
What Is Roof Preservation and Who Qualifies for It?
Roof preservation restores flexibility and slows deterioration in shingles that are aging but not yet failing, which is the gap most homeowners don't know exists between "fine" and "replace it all." Instead of tearing off a roof at the first sign of wear, preservation targets the shingles themselves to lock in granules and extend the years of service left.
Shingle Roof Renewal's own process uses Green Soy Technology, a soy-based treatment certified to restore flexibility to dried, brittle asphalt shingles rather than mask the problem with a coating. It's applied after a qualification assessment, not sold as a one-size-fits-all fix.
Eligibility typically depends on a few factors an inspector checks directly:
- The roof is within a reasonable age window, generally not decades past its rated life.
- Granules are thinning but not entirely gone; bare mat exposure usually disqualifies a section.
- There's no widespread decking rot underneath.
- Seal strips are still intact across most of the roof surface, even if a few tabs have lifted.
Before hiring anyone for preservation work, ask direct questions: What's your qualification process? What percentage of roofs you inspect actually qualify? What warranty backs the treatment, and is it transferable if you sell the home? A legitimate provider will tell you plainly when a roof doesn't qualify rather than pushing treatment on a roof that's already past saving.
Which Prevention Steps Give You the Most Protection for the Least Effort?
Not every task on a maintenance checklist carries equal weight, and homeowners with limited time or budget should know which fixes matter most.
At the top of the list sits attic ventilation.
Right behind it is the seasonal inspection rhythm itself. Spring and fall checks, plus a scan after every major storm, catch the small, cheap repairs before they become expensive ones, and that habit alone accounts for much of the 5 to 10 years of added service life seen in well-maintained asphalt roofs.
Flashing and pipe boot maintenance ranks third in urgency, not because it's more damaging than wind or hail, but because it's the most common source of active leaks and the cheapest to fix while it's still small. Moss and algae treatment matters too, but it's lower urgency unless growth has already spread across a large section, since moss damage tends to build slowly rather than strike all at once. Tree trimming and gutter cleaning round out the list. They're low-effort, low-cost tasks that prevent a disproportionate share of water intrusion and debris damage for the time they take.
What Does Preventive Roof Maintenance Typically Cost?
Budgeting for prevention is far cheaper than budgeting for failure, and the numbers make that case clearly. Annual professional maintenance visits, covering inspection, minor resealing, and debris removal, typically run $250 to $600 depending on roof size and complexity.
Attic ventilation upgrades vary more widely depending on whether you're adding soffit vents, a ridge vent, or correcting an existing imbalance, but they're a one-time investment rather than a recurring cost. Moss and algae treatments done as part of routine maintenance add little to a standard visit, while letting growth spread untreated for years often means replacing damaged sections instead of simply cleaning them.
Compare any of this to the cost of full replacement, which commonly runs $15,000 to $30,000 for a typical asphalt shingle roof, and the math tilts heavily toward prevention. A homeowner spending $500 a year on maintenance for a decade spends $5,000 to potentially add a decade of service life to a roof that would otherwise need full replacement. Preservation treatments, when a roof qualifies, sit well below the cost of a tear-off and new install, often saving homeowners a substantial percentage compared to starting over.
How Do You Choose a Qualified Roof Inspector?
Not every inspector is equally qualified, and the difference shows up in how they diagnose your roof, not just what they charge. Look for someone who inspects the whole system, ventilation, flashing, fasteners, and decking together, rather than someone glancing at shingles from the driveway and quoting a replacement on the spot.
Ask these questions before hiring anyone:
- Are you certified or affiliated with a recognized industry body, and can you show documentation?
- Will you go into the attic as part of the inspection, not just walk the roof surface?
- Can you provide a written report with photos, not just a verbal summary?
- Do you offer repair or preservation options, or does every inspection end in a replacement quote?
Red flags to walk away from: an inspector who won't go into the attic, someone who pressures same-day signature on a large contract, vague or unwritten estimates, and anyone who can't explain why they're recommending replacement over repair when the roof shows only localized damage. A storm-season inspection checklist can help you evaluate whether the inspector you hired actually covered the right ground. For general inspection prep, this homeowner inspection guide walks through what to have ready before anyone climbs a ladder.
Why Prevention Before Replacement Matters
I've spent enough time around roofs to know the conventional advice, "replace at the first sign of trouble", gets it backward more often than it gets it right. Most homeowners who call a roofer first hear the word "replace" before anyone's checked whether the roof actually needs it. That's the gap Shingle Roof Renewal exists to close.
Our process starts with an inspection, moves to an honest assessment of the roof's actual condition, and ends with a straightforward recommendation, not a sales pitch. When a roof qualifies, our certified Green Soy Technology restores flexibility to shingles that have dried out under years of sun and heat, backed by a six-year transferable warranty that carries over if you sell the home. When a roof doesn't qualify, we say so.
Call us before you call the roofer. That's not a slogan we picked because it sounds good; it reflects the actual order of operations that saves homeowners money and keeps usable material out of a landfill.
How a Free Roof Assessment Can Save You From an Unnecessary Replacement
If your roof is showing early wear, thinning granules, a few lifted tabs, aging but not yet brittle shingles, a preservation assessment tells you definitively whether it can be restored instead of torn off. Shingleroofrenewal's process is diagnostic first: we inspect, assess actual condition, and recommend either preservation or, when a roof genuinely needs it, referral for replacement. There's no obligation built into the inspection itself.

Homeowners who qualify for treatment with our certified Green Soy Technology have saved substantially compared to full replacement, backed by a six-year transferable warranty that stays with the house if you sell. Before your visit, have a few things ready: recent photos of any visible damage, the approximate age of your roof, and notes on any past leaks or repairs. Assessments typically take under an hour, and you'll get a clear answer, not a pressured sales pitch, about whether preservation makes sense for your specific roof.
If you've been putting off a roof decision because the replacement quotes felt too high or too final, schedule your free roof assessment and find out whether your roof still qualifies for preservation before you spend a dollar on replacement.
Sources
- NRCA roofing guidelines: installation and common failure causes
- Asphalt shingle roof lifespan — The Roofing Brief