
If your roof went through hurricane-force wind, assume some level of shingle damage until an inspection proves otherwise. Stay off the roof until conditions are safe, photograph everything from the ground before you touch anything, and hold off on permanent repairs until you've documented what you see. Call a professional if you spot missing shingles, exposed decking, or active leaks; otherwise, a careful visual inspection within a day or two is usually enough to start the process.
TL;DR:
- Roofs older than 10 years have about a 50% likelihood of sustaining wind damage, even if they meet manufacturer-rated wind resistance.
- Visible damage includes creased or torn shingles, missing tabs, and exposed decking, mainly at eaves, rakes, and ridges, with pattern signs indicating storm impact.
- Most hurricane claims should be documented thoroughly with photos, contractor estimates, and notes on conditions to prevent claim denial or reduction.
- Repair costs vary widely: small fixes may cost a few hundred dollars, while full replacements can reach $15,000 to $30,000 depending on size and material.
- A professional inspection can determine if preservation is possible, potentially avoiding unnecessary full roof replacements, especially if damage is isolated and shingles remain flexible.
Table of Contents
- How Wind Damages Asphalt Shingles: Modes and Roof Locations at Risk
- Visible Signs of Hurricane Wind Damage: What to Photograph
- What's the Safest Way to Inspect Storm Damage Yourself?
- Repair Options After Wind Damage: Fix, Patch, or Replace?
- Insurance and Claims Basics for Hurricane Wind Damage
- Prevention and Resilience: Materials and Maintenance That Improve Wind Performance
- What Daniellison's Field Experience Says About Preservation vs. Replacement
- What Is the Timeline for a Hurricane Wind Damage Insurance Claim?
- How Much Does Wind Damage Repair Typically Cost?
- What Inspectors and Adjusters Actually Look For
- Get a Free Inspection Before You Commit to a Full Roof Replacement
- Where to Learn More About Wind Damage and Roof Claims
- Sources
- FAQ
How Wind Damages Asphalt Shingles: Modes and Roof Locations at Risk
Wind doesn't peel shingles off uniformly. It attacks specific weak points, and understanding those points helps you read your roof correctly after a storm.
Four failure modes show up again and again in field surveys. Creasing happens when a gust lifts a shingle's edge and folds it back hard enough to crack the mat underneath, even if the shingle settles back into place looking almost normal. Flipping is more obvious: the shingle bends past its breaking point and stays upturned. Tearing and outright removal happen when uplift force exceeds what the nails and sealant strip can hold, and abrasion happens when wind-driven debris, gravel, or tree limbs scrape granules off the surface.
These failures cluster in predictable places. Eaves, rakes, hips, ridges, and roof corners take the worst punishment because wind accelerates and turns turbulent at those transitions, a pattern documented in research on turbulence in landfalling hurricanes. Valleys collect water and debris, which adds abrasion on top of wind stress.
Age changes everything. A University of Illinois analysis of shingle wind performance found that roofs older than 10 years carry roughly a 50% probability of sustaining damage during a high-wind event, compared to much lower odds for newer installations. Manufacturer wind ratings are lab numbers measured on new material; a decade of Florida sun and heat degrades the sealant strip long before the shingle itself looks worn. Installation shortcuts, like high nailing or a skipped starter course, shave years off that field performance regardless of what the rating label promised.
Visible Signs of Hurricane Wind Damage: What to Photograph
Some damage announces itself. Other damage hides until a homeowner or contractor knows exactly where to look.
Definitive signs leave no ambiguity:
- Torn or heavily creased shingles, especially where the crease runs across the full width of the tab
- Missing shingles or missing tabs, leaving a visible gap in the field
- Broken or lifted ridge caps
- Exposed felt or decking where shingles have blown off entirely
- Granules pooled in gutters or downspouts in unusual quantity
Subtle signs require more careful interpretation. A shingle that's loose but shows no crease or tear isn't automatically wind damage; sealant strips fail naturally with age, and a review of common misconceptions about wind damage notes that unsealing trends upward starting around year four or five regardless of storm activity. Patterned granule loss concentrated on windward slopes tells a different story than scattered, even wear across the whole roof; the former points to wind and debris, the latter to normal aging.
Statistic to keep in mind: field surveys after major hurricanes found roughly 44% of three-tab roofs showed little to no damage, versus 87% for laminated shingles in the same storm exposure in certain sampled areas, a reminder that shingle type and installation quality matter as much as wind speed alone.
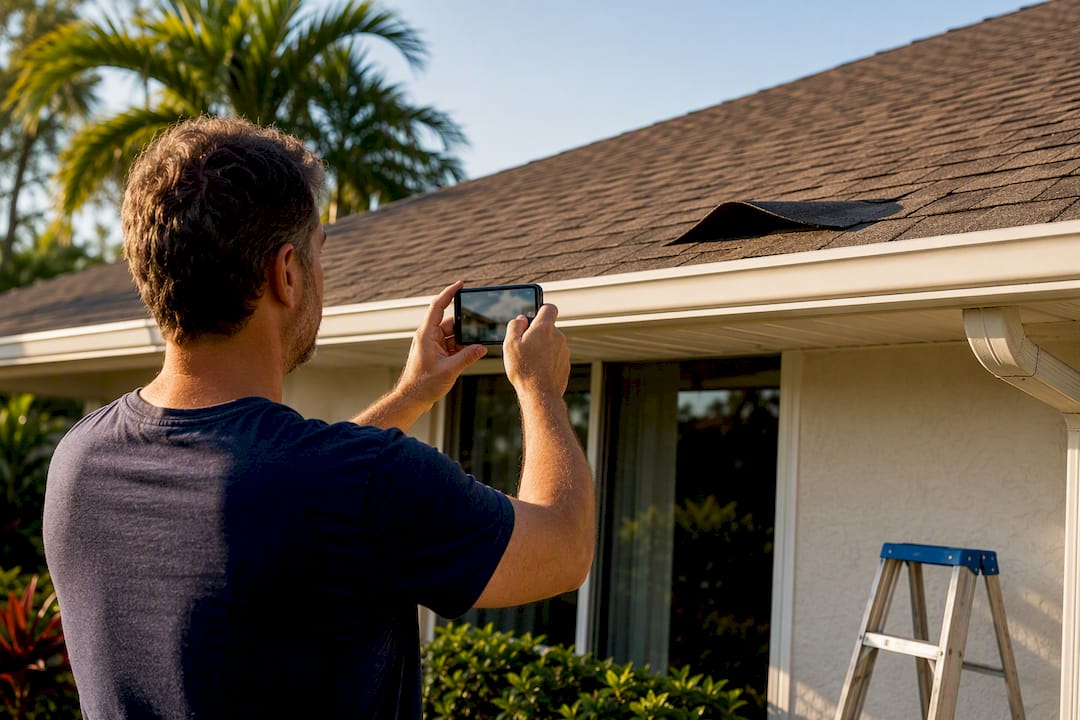
Photograph every finding twice: one wide shot showing the location on the roof plane, one close-up showing the damage detail. Turn on your phone's date stamp or timestamp overlay, and photograph the same spot from a consistent angle if you check it again days later. This sequence matters more than most homeowners realize, since insurers and contractors both want to see damage progression, not just a single moment.
What's the Safest Way to Inspect Storm Damage Yourself?
Skip the ladder if wind gusts are still above 15 to 20 mph, if the roof is wet, or if you can see downed power lines anywhere near your property. None of that is worth a fall or an electrocution risk for photos you can get another way.
Ground-based tools do most of the job safely:
- Walk the perimeter first. Look for shingles, granules, or flashing pieces in the yard, gutters, and against fences; debris on the ground often tells you where the roof failed before you ever look up.
- Use binoculars or a zoom lens from multiple angles around the house to scan for missing tabs, lifted ridge caps, and exposed decking.
- Fly a drone if you have one, capturing each roof plane in a slow, overlapping pass rather than a single wide shot.
- Check the attic with a flashlight for water stains, daylight coming through the decking, or damp insulation, all of which indicate a breach even when the exterior looks fine from below.
- Log every finding with a location note (northeast slope, near ridge) alongside each photo.
If you genuinely need to get on the roof, wait for full daylight, dry conditions, and calm wind, and never go alone.
Pro Tip: Keep a written log next to your photos with the date, time, and wind conditions at the moment you took each shot. Adjusters and contractors both move faster when the timeline is already organized for them.
Temporary mitigation has limits. A tarp over an exposed section, weighted down and nailed only into damaged material, can prevent interior water damage while you wait for repairs. Hand-sealing a handful of lifted tabs with roofing cement is reasonable for a small, isolated area. Once you're dealing with more than a few damaged shingles, exposed decking, or anything requiring you to walk a steep pitch, stop and call a professional instead of improvising further.
Repair Options After Wind Damage: Fix, Patch, or Replace?
Not every wind event ends in a new roof. The right path depends on how much of the roof failed, how old the shingles were going in, and whether the decking underneath stayed dry.
Three tiers of response cover almost every situation:
- Emergency repairs stop active water intrusion the same day: tarping, hand-sealing loose tabs, and covering exposed nail holes.
- Permanent local repairs replace individual damaged shingles, reseal flashing around vents and chimneys, and restore small sections without touching the rest of the roof.
- Full replacement becomes necessary when damage spreads across multiple roof planes, when the decking itself is soaked or rotted, or when the shingles were already near the end of their service life before the storm hit.
Age is the deciding factor more often than storm severity. A roof that was five years from replacement anyway, with widespread granule loss and multiple unsealed courses even before the hurricane, usually isn't a good candidate for patch repairs; the labor cost of chasing scattered failures across an aging roof frequently approaches what a full tear-off would cost. A roof that's mid-life, with damage concentrated on one or two slopes and the rest of the field still flexible and well-sealed, is a much stronger candidate for targeted repair. If you're weighing that decision, a closer look at why Florida asphalt roofs fail and how to extend their life walks through the aging process in more detail. Delamination, where the shingle layers separate from heat and UV exposure over years, is one of the clearest signs that repair won't hold regardless of how the wind treated it.
Insurance and Claims Basics for Hurricane Wind Damage
Standard homeowner policies cover wind damage to roofs, but coastal properties usually carry a separate hurricane deductible on top of the regular one. That deductible commonly runs between 2% and 10% of your dwelling coverage amount, which means a $300,000 dwelling limit could carry a deductible anywhere from $6,000 to $30,000 before the policy pays a dollar. Check your declarations page for the exact percentage; it varies by carrier and by county.
File a claim once you have clear evidence of storm-caused damage, not before you've documented it and not so long after that the timeline becomes hard to reconstruct. Most carriers set a filing deadline measured in months, not years, after the storm date.
Documentation makes or breaks a claim more often than the damage itself does:
- Photograph and video every affected area before any repair work begins, including wide shots and close-ups
- Get written estimates from two or three contractors, since a single quote gives an adjuster less to work with
- Keep receipts for any emergency mitigation, like tarps or temporary sealing materials
- Note the storm name and dates so the damage ties clearly to a specific weather event
The most common claims mistake is completing permanent repairs before an adjuster ever sees the damage. Once shingles are replaced, there's nothing left to inspect, and the claim often gets reduced or denied for lack of evidence. The second most common mistake is failing to distinguish pre-existing wear from storm damage; a detailed field guide on misconceptions in wind-damage claims points out that adjusters specifically look for patterned creasing and tearing concentrated in windward zones, not scattered unsealing, when they attribute damage to a named storm. A post-storm inspection checklist built for South Florida homes covers the documentation sequence in more depth if you want a step-by-step reference before the adjuster arrives.
Prevention and Resilience: Materials and Maintenance That Improve Wind Performance
Wind ratings only tell you how a shingle performed brand new, in a lab, under controlled conditions. Real roofs age, and that gap between lab rating and field performance is where most storm losses actually happen.
Standard 3-tab shingles typically carry wind ratings around 60 to 90 mph, while laminated or architectural shingles often reach 110 to 150 mph thanks to their heavier weight and multi-layer construction. Premium Class H products push that further still. But a 15-year-old architectural roof with dried-out sealant won't perform anywhere near its original rating, which is why age matters more than the label once a roof has weathered several Florida summers.
Installation details make a measurable difference regardless of material grade:
- Correct nail placement, high enough on the shingle to catch both layers, prevents the blow-offs that plague improperly installed roofs
- A proper starter course along eaves and rakes gives the first row of field shingles something solid to bond against
- Supplemental adhesive along edge zones, applied per FEMA's building science guidance on high-wind roof performance, measurably increases uplift resistance in the areas that fail first
Pro Tip: If your roof is past the halfway point of its expected lifespan, ask whoever inspects it whether the sealant strips still show any tackiness. A roof that's lost that adhesive quality is far more vulnerable in the next storm, even if it looks fine from the driveway.
Maintenance that restores flexibility to aging shingles, rather than just patching the visible failures, slows the sealant degradation that turns a stiff, brittle roof into a wind liability years before it needs full replacement. If prevention and repair keep circling back to the same underlying question, our guide on cost-effective ways to extend your shingle roof's life breaks down that trade-off further. If solar installation is part of your storm-recovery plans, proper roof preparation for solar covers fastening and structural considerations worth reviewing before panels go up.
What Daniellison's Field Experience Says About Preservation vs. Replacement
Preservation only works as a real alternative when the roof still has flexibility left to restore. Once shingles have delaminated or the decking is exposed across multiple planes, no adhesive treatment changes that outcome.
Shingle Roof Renewal's process reflects that reality: inspect the roof, assess its actual condition, then determine whether it qualifies for preservation rather than assuming every storm-damaged roof needs a tear-off. A roof with isolated wind damage, intact decking, and shingles that still bend rather than snap is frequently a strong candidate. A roof with widespread granule loss, brittle mat material, and storm damage layered on top of years of UV degradation usually isn't, and pretending otherwise wastes a homeowner's money on a fix that won't hold through the next season.
What Is the Timeline for a Hurricane Wind Damage Insurance Claim?
Most hurricane roof claims move through four stages, and understanding the sequence helps you avoid the mistakes that slow everything down.

Filing happens as soon as you've documented the damage, usually within days to a few weeks after the storm. Report the claim by phone or through your carrier's app, and get a claim number immediately.
Inspection typically follows within one to three weeks, though major hurricanes that generate thousands of simultaneous claims can push that timeline to a month or more. An adjuster visits the property, photographs the same damage you already documented, and compares notes with any contractor estimates you've submitted.
Evaluation is where the carrier calculates the payout against your dwelling coverage and hurricane deductible. This stage can move quickly for straightforward, well-documented claims or drag on for weeks if the adjuster questions whether damage is storm-related versus pre-existing wear.
Settlement arrives as either a lump-sum check or, more commonly for larger claims, an initial payment followed by a second check once repairs are underway or completed. Depending on your carrier and the storm's overall claim volume, the full process from filing to final payment can run anywhere from a few weeks to several months.
The single biggest lever homeowners have over that timeline is documentation quality submitted at filing. Claims with clear, timestamped photos and multiple contractor estimates move through evaluation noticeably faster than claims where the adjuster has to chase down missing information.
How Much Does Wind Damage Repair Typically Cost?
Repair costs swing widely based on scope, and the biggest variable isn't the storm's wind speed, it's how much of the roof actually failed.
Small, isolated repairs, like resealing a handful of lifted tabs or replacing a section of ridge cap, sit at the low end of the cost spectrum because they involve minimal labor and material. Costs climb from there based on several factors:
Roof pitch and height affect labor pricing directly, since steep or multi-story roofs require more safety equipment and time. Shingle type matters too; matching an existing architectural shingle line can cost more than a comparable 3-tab repair if the original product has been discontinued or the color has weathered unevenly. Decking exposure changes the math significantly, since any repair that requires replacing plywood sheathing underneath adds material and labor that a surface-level shingle repair never touches. Access and disposal, including debris removal and dumpster fees, add up faster on larger jobs.
Full replacement sits in a different cost tier entirely, often running $15,000 to $30,000 depending on square footage, material grade, and local labor rates. That gap between a $500 local repair and a five-figure replacement is exactly why an honest condition assessment before committing to either extreme matters. A roof that qualifies for preservation and targeted repair instead of full replacement can save homeowners a meaningful percentage of that replacement cost, which is worth confirming before assuming the worst.
What Inspectors and Adjusters Actually Look For
Professionals scan for patterned creasing and tearing on windward slopes first, since that pattern is the clearest signal of storm-caused failure rather than gradual aging. The most common homeowner mistake is fixing damage before anyone documents it, followed closely by mixing up years of granule loss with a single storm's impact.
Inspect early, photograph everything, and don't assume replacement is the only answer before someone has actually assessed the shingles up close.
— Daniellison
Get a Free Inspection Before You Commit to a Full Roof Replacement
Shingle Roof Renewal is call you make before the roofer gives you a replacement quote you haven't verified against your roof's actual condition. Where a full tear-off runs $15,000 to $30,000, a roof that qualifies for our Green Soy Technology preservation process can be restored for a fraction of that cost, backed by a 6-year transferable warranty.

If your roof took hurricane wind exposure but the damage looks isolated to a few slopes, with no widespread decking exposure or delamination, it's worth finding out whether preservation is still on the table before you sign a replacement contract. Our process is simple: we inspect the roof, assess its condition, and tell you honestly whether it qualifies for renewal or needs full replacement. For a step-by-step look at what our inspection covers, our roof inspection checklist walks through the process we follow on-site. Schedule your free roof inspection today and find out where your roof actually stands before you spend a dollar on replacement.
Where to Learn More About Wind Damage and Roof Claims
- Haag Engineering's technical paper on wind-damage misconceptions explains how professionals distinguish true wind damage from ordinary aging.
- The University of Illinois repository on shingle wind performance provides the underlying lab and field data behind wind-rating standards.
- A hurricane roof insurance claim filing guide walks through deductibles, timelines, and documentation requirements in more depth.
Sources
- Laboratory and field data on asphalt shingle wind performance (University of Illinois repository)
- Misconceptions of Wind Damage to Asphalt Composition Shingles — Haag Engineering
- Wind effects on asphalt shingles — Haag / Marshall et al.
- Hurricane Roof Insurance Claim: 2026 Filing Guide
FAQ
Is Wind Damage to Shingles Covered by Insurance?
Yes, standard homeowner policies cover wind damage to roofs, but coastal hurricane claims typically carry a separate hurricane deductible of 2% to 10% of your dwelling coverage amount, separate from your regular deductible.
What Does Wind Damage on Shingles Look Like?
Definitive wind damage shows up as creased or torn shingles, missing tabs, broken ridge caps, and exposed underlayment, concentrated on eaves, rakes, corners, and ridges. Loose but uncreased shingles or evenly scattered granule loss more often point to normal aging than storm impact.
What Wind Speed Can Damage Shingles?
Standard 3-tab shingles are typically rated for 60 to 90 mph, while laminated architectural shingles reach 110 to 150 mph. Roofs older than 10 years carry roughly a 50% chance of damage in high-wind events regardless of their original rating, since sealant and material flexibility degrade over time.
What Type of Roofing Shingles Are Best for High Winds?
Laminated or architectural shingles generally outperform 3-tab shingles in wind events, with field surveys after hurricanes showing significantly lower damage rates for laminated products at comparable wind exposure. Proper installation, including correct nailing and starter course placement, matters as much as the material grade itself.
Should I Repair or Replace a Wind-Damaged Roof?
That depends on the roof's age, how widespread the damage is, and whether the decking stayed dry underneath. A roof with isolated damage and shingles that are still flexible is often a candidate for preservation or targeted repair rather than a full tear-off, which is exactly what a free inspection is meant to determine.